Related Posts Plugin for WordPress, Blogger...
Showing posts with label painting. Show all posts

Wednesday, February 15, 2017

DIY: How To Stain A Pine Patio In 7 Easy Steps With Cabot's

I am thrilled to work with Cabot's an Australian company known for their quality wood oil and stain products on our new deck and patio project.

We tried their exterior product range for oiling our new timber deck and staining our new pine patio which I'll share in two separate blog posts.

So what is the difference between a stain and an oil ?

If you like the look of the timber and just want to protect it you use an oil - this is what we are using for our timber deck as its made from beautiful Merbau timber and we want to enhance the natural look of the timber and protect it. With an oil you paint it on and it absorbs in and drys like a clear coating so your natural timber can shine through in all its glory.

Whereas if you don't particularly like the look of the timber and want to change it to a different colour then you use a stain - this is what we are using for our treated pine patio because we don't like the look of pine and want to stain it a darker colour to match the Merbau timber deck.


What do you need to stain a pine patio ?

You don't need a lot for this DIY which keeps the cost down considerably, all you need is the stain, a paint brush, buckets and drop sheets that's it!
  • Stain - We used Cabots Deck and Exterior Stain (water based) in 'New Jarrah'
  • Paint brush - A wide angled brush works best for painting around framework
  • Small bucket - To decanter stain into and keep refilling as you work
  • Large bucket - Filled with water to wash brushes when finished
  • Drop sheets - To protect work area


How to stain a treated pine patio in 7 easy steps

1. Pick a colour - Once we decided to use a stain we had to pick a stain colour and narrowed it down to two colours New Jarrah and Marbau. We painted the stain onto some treated pine off-cuts to see which one we liked the best and the New Jarrah has a nice red tint to it whereas the Merbau was a bit too brown so we went with the New Jarrah. Besides how can I call my blog namesake Jarrah Jungle and not pick jarrah!

2. Get the site ready - Before you start be aware you need to leave new wood to settle for a few weeks before staining its best to check the manufacturers directions for this (our pine was out in the weather for over 4 weeks before we stained it). Make sure the woods surface is clean of any dirt or dust before you start, we used rags to wipe the pine clean. Put down drop sheets to protect the ground from any drips (in our case our beautiful new deck!) and you are good to go. We worked from a scaffold which made it so much easier and safer to access the patio from that height.

3. Get the stain ready - Give the stain a good stir with a stick and then decanter a small amount into a bucket to work from. Put the lid back on the stain to keep the air out so it stays in good condition. Keep refilling the bucket with stain as you need to.

4. Paint it on - Pick up your paint brush and start painting the stain on using long fluid strokes. Remember if you leave a blob of stain and come back a minute later it will dry like that blob because the stain absorbs into the wood. So clean up any drips and blobs as you go with the paint brush.


5. First coat - The first coat always takes the longest - it took us 10 hours to paint a 10 meter long patio with ceiling frame work and side poles. The stain absorbed quickly into the pine and it was really good to work with and gave great coverage. A 4 ltr tin of stain did the first coat.

6. Second coat - It is dry enough for re-coat after 2 hours however after 10 hours of staining spread over the weekend we didn't get around to doing the second coat until a few days later. The second coat always goes on a lot quicker than the first, uses less product, and best of all it took us half the time.  We used about 3 ltrs on the second coat.

7. Clean up - The stain is water based which makes clean up really easy just wash your brushes out with water. This is why I always prefer to use water based products - there's little to no smell and clean up is so easy without the use of chemicals or cleaning products.

And that my friends is how in 7 easy steps you can turn a treated pine patio
into a more expensive looking timber patio !


I am so happy with how it's turned out all thanks to Mr P who worked like a trooper in the hot summer heat to get the patio stained and ready for the carpenter to finish it off by installing the roof sheeting and new fence.

Coming up next I'll be writing a blog post on How to oil a timber deck using Cabot's exterior products.

What would you like to stain at home ... Outdoor furniture? A deck? Something else!


Sharing with link parties:
Curly Crafty Mom - The Creative Corner
The Dedicated House - Make It Pretty Monday
Savvy Southern Style - Wow Us Wednesdays


Disclosure: Thanks to Cabot's for providing me with these stain products for review. I have not received any payment or compensation. As always, all opinions are my own.

 photo F0F68C01A59FABD46732FC15E1D8816D_zpsc6047f2f.png

For exclusive extras and daily updates ... follow Jarrah Jungle on Facebook, Instagram and Twitter


[All images my own]

Pin It Now!

Wednesday, February 8, 2017

Backyard Progress: Patio Build + Fence Install

Following on from last weeks backyard progress blog post and our new timber deck being built as part of this design we also had the carpenter build a patio to sit over the deck.

The patio comes directly off our house and will be like an outdoor room where we can BBQ, dine, chill out and entertain.

Firstly, the treated pine patio posts were core drilled into our new limestone retaining wall for strength and support. Once the patio was finished the carpenter installed a Colorbond fence (the same as the new side fence) along the retaining wall and these patio posts will form the support posts for the fence. 


The frame is all made from treated pine which we will stain to look like a more expensive timber.

We went with a peaked roof design rather than a flat roof so it has a higher ceiling and gives the illusion of more space. 


Mr P and I got busy on a stinking hot 40 degree weekend and stained all the patio posts and ceiling beams and transformed the treated pine into a beautiful looking timber.

This had to be done before the carpenter could install the roof sheeting.

I'll be writing a separate blog post on How to stain a treated pine patio in 7 easy steps using Cabot's exterior products. Here are a few sneak peeks of us staining the patio and when I say "us" of course I mean Mr P did all the work while I kept him replenished with icy cold drinks, snacks and words of encouragement!


We spent the weekend applying the stain and then the carpenter returned during the week to install the metal roof sheeting.

For roof colours we picked Colorbond - Shale Grey which is a light grey as we thought the lighter colour would be a bit cooler and the grey tones suit our tile roof colour which is Colorbond - Monument and is a very dark charcoal.

We also added some sheer roof sheeting to let light in as we were worried the closed in roof would make the inside of our house too dark - we picked the sheer roof sheeting in a 60% tint.

The house is a bit darker now that the patio roof is on, even with the tinted sheets, so it was a good idea to include these otherwise it would be so dark we would need to turn lights on during the day which is not what we want to do.


For some colour contrast we painted the treated pine ceiling beams white so that the stained timber frame would stand out more. If it was all stained timber we thought it would be a bit too busy.

Funny story about painting the treated pine ceiling beams white .... I accidentally painted the wrong ones - there were 2 piles of wood and I painted the flat beams instead of the square beams - this is why I'm good at making sandwiches while Mr P tackles the DIY!

The carpenter had to paint the correct pine beams white before he installed them. 


The carpenter then installed the Colorbond fence panels using the treated pine posts (which we had stained) as the supports the fence was attached too.

This was Mr P's idea to break up the metal fence with timber and to make the posts a feature - I was really unsure about it and wanted to play it safe and stick with metal fence supports the same colour as the fence but in the end Mr P was right they really do make a nice feature.

Sometimes you need to take risks when renovating and trust that it will turn out for the best!


With the patio being attached to the house there were some changes that had to happen to our gutters and down pipes as well - the roof tiles were removed and the house gutter and a different style a V gutter attached between the house and patio.

A new gutter was installed on the outside of the patio and we picked the same colour as the roof sheets Colorbond Shale Grey.

New down pipes were installed as well which we picked in both Colorbond Classic Cream to match our cream coloured rendered brick walls and in Colorbond Manor Red to blend in with the timber support poles stained in 'jarrah'.

What a big project this has been - first we had the retaining walls built, then the deck was laid, then the patio with a new roof was built and lastly the fence was installed.

The French Doors we installed 4 years ago in the kitchen and dining room by removing a window and turning it into a doorway are finally being opened and used to access the deck and patio area which is awesome.


I can't believe after all this time our long awaited dream for a backyard deck and patio has finally become a reality!

All that's left to do now is oil and seal the timber deck which is our next weekend project and as mentioned I"ll be using some exterior products from Cabot's to do this.

Then we can move our outdoor furniture and bbq out here, decorate with some pot plants, and finally relax and enjoy the outdoor room we have created!

Do you have an outdoor patio or pergola?

 photo F0F68C01A59FABD46732FC15E1D8816D_zpsc6047f2f.png

For exclusive extras and daily updates ... follow Jarrah Jungle on Facebook, Instagram and Twitter


[All images my own]

Pin It Now!

Wednesday, July 20, 2016

DIY: Painting The Eaves Around The House

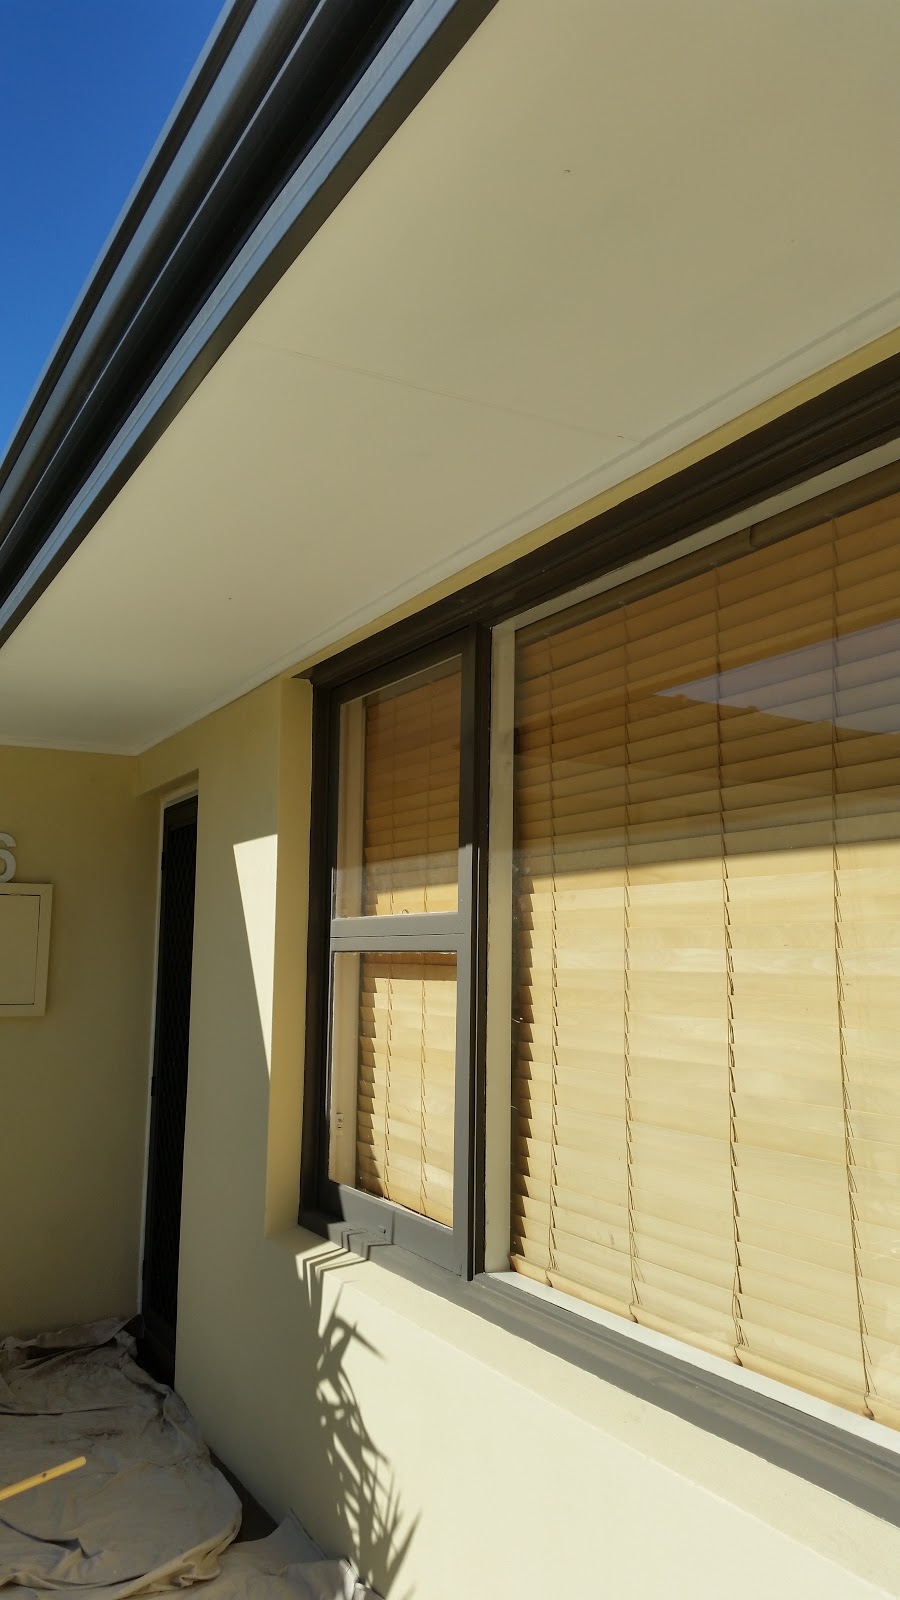
I am happy to report that Mr P and I did our last lot of exterior painting of the Jarrah Jungle home the other weekend and finished painting the eaves around the front of the house.

We have painted every part of our exterior from the rendered brick front and back and sides of the house and the window frames (we painted these twice ... the first time white and then a few years later a charcoal colour).

The old fibro asbestos eaves we had removed and replaced with fibre cement sheets when we did our garage extension about 4 years ago. We painted the back and side eaves when we painted the back of the house but we hadn't gotten around to painting the front eaves ... until now!


To finish off the eaves Mr P had some scotia that he cut to size on an angle using the power saw and then secured to the eaves with a nail gun. The scotia fills the gap between the brickwork and ceiling and makes it look neat and tidy.

Any nails that were sticking out Mr P hammered in so they are smooth and then used a putty to go over the nails so you couldn't see the nail heads.

The eaves and scotia were then ready for painting.


To prep the eaves to paint we used a broom to clean off the cobwebs, bugs and dirt and then used a dry rag to give them a good wipe over to make sure they were clean.

We laid drop sheets down and only used painters tape for the garage door area and the rest of the eaves Mr P painted free hand with a patient hand, an angled brush and a wet rag to wipe up any drips and slips as he went.

Now for the type of paint we used Spring Flat Plastic Paint in white - it is a really inexpensive paint (we picked up 4 ltrs from Bunnings for under $15). The odour is a little strong but as we were painting outside it didn't really bother us. It is a plastic type paint so it will take forever to mix properly by hand so I suggest you use a paint mixer like the one I'm using below - simply attach  the mixer to a drill and use the drill to mix it and it's ready in just a few minutes. 


That's it once the prep work was done we were ready to paint .... Mr P as always was the cutting in master and I'm the roller girl waiting for my turn to follow with a roller. I am very grateful to whomever invented the painting stick or I'd never be able to reach the ceiling!

We painted on one coat and then waited a few weekends (due to the wet weather) until we could get out there and do the second coat of paint.


What a difference a nice fresh coat of white paint makes. 

But wait that's just the first coat you always need to do two coats to get a nice even coverage. But the good news is the second coat always goes on much quicker and easier.


It's almost a bittersweet feeling knowing that we have almost finished our Jarrah Jungle renovations ... how will we spend our weekends when we don't have things to paint!

Have you done any painting around the house lately?

I have added our painting projects big and small to my Projects Page which you can find here


 photo F0F68C01A59FABD46732FC15E1D8816D_zpsc6047f2f.png

For exclusive extras and daily updates ... follow Jarrah Jungle on Facebook, Instagram and Twitter


[All images my own]

Pin It Now!