Related Posts Plugin for WordPress, Blogger...

Tuesday, September 4, 2012

Recipe: Mixed Berry and White Chocolate Muffins

I had one of those eek what have I done moments with this Donna Hay Mixed Berry and White Chocolate Muffin recipe because the mix turned out PURPLE!

I freaked out thinking I was trying to do a nice thing baked muffins for Mr P to take into work and he'd be embarrassed handing out my PURPLE muffins to his work colleagues!

They turned out OK once the mix started to bake they went from purple to brown and another baking disaster was adverted phew!

Before

After

So here is the recipe for moist tasty muffins, don't let the purple scare you at least you are forewarned (unlike me!)
Mixed Berry and White Chocolate Muffins
Donna Hay Modern Classics Book 2
Makes 12 muffins

2 cups plain flour
2 tsp baking powder
3/4 cup caster sugar
1 cup sour cream
2 eggs
1/3 cup vegetable oil
1 1/4 cups frozen mixed berrys (part defrosted
3/4 cup chopped white chocolate

Preheat the oven to 180c.
Sift the flour and baking powder into a bowl. Add the sugar and stir to combine.
Place the sour cream, eggs, and oil in a bowl and whisk until smooth.
Stir the sour cream mixture through the flour and sugar mixture until just combined.
Sprinkle over the berries and stir once.
Spoon the mixture into 12 capacity non stick  muffin tins until two-thirds full.
Bake for 20 minutes or until cooked when tested with a skewer.


[All images my own]

Pin It Now!

Monday, September 3, 2012

Interior Design Course: Week 4

Here's a recap of what I learnt in Week 4 of the Interior Design Course


WEEK 4
Storage Solutions
Planning and Designing storage areas
Hardware and fittings
Decluttering workshop

In week 4 we learnt all about storage - where we keep things now and where we could improve on and store things where we use them to make our lives easier.

What I liked about this session was that we were giving solutions to the problems and not trying to change peoples behaviour. A good example of this is a husband was throwing his clothes on the floor instead of into the laundry basket, he was asked why he doesn't put it into the basket and it turns out he throws them and misses and so they stay on the floor -  the solution was to buy a bigger basket, now he doesn't miss and his clothes go into the basket not on the floor. Everyone's happy!

A big problem area in our homes nowadays is a communication zone for charging phones and ipads and using the laptop and such. This is a good thing to build into the design of new homes, preferably into the kitchen area which is the hub of the home for everyone to use.

We looked at styles of storage - when to use glass doors in kitchens, when to use baskets, when to use solid doors and when to use open shelves.

I've been pretty clever with storage in my home so far:
  • My clothes are organised in a custom built wardrobe in my master bedroom
  • I'm using the wardrobe in my guest bedroom for winter coats and my scarfs
  • I've converting the never used hallway coat cupboard into a shoe cupboard
  • The newly renovated bathroom has the biggest vanity cabinet it could fit to hold all my essentials
  • My Ikea expedit bookcase in the study is perfect for my books and displaying items it is my favourite piece of furniture
  • The coffee table in the living room  has large drawers to hide magazines and books which was a fantastic storage purchase.
 
My old wardrobe

Installed a new wardrobe

My old coat cupboard
 
Turned into a shoe cupboard
 
 
My old bathroom vanity had no storage - the wall unit was the only storage
 
This is the new bathroom vanity (still renovating this one!)
 
My bookcase in my study/craft room
 
My coffee table in my living room
 
We did a decluttering workshop where everyone picked a room we wanted to work on at home and then split into small groups to discuss our problems and come up with solutions. My problem areas are the kitchen and laundry which need to be renovated with a lot of thought to the storage needs.

I ended up picking the laundry workshop as this is the smallest room in our house but has many purposes - it's a thoroughfare from the kitchen out into the backyard through one door or into the new garage through another door. It also has the toilet which people then use the laundry trough to wash their hands. The room has a 2 mtr wall for washer and trough and on the other side toilet and built in cupboard. I need to make this room look good as it is a thoroughfare but also practical to hold storage of spill over items from the kitchen and the usual laundry cleaning items.

There were 3 in my group including me, one was building and the other was renovating but unlike me had heaps of space. We brain stormed storage ideas, making use of the space on the back of doors for brooms etc, hanging airers onto walls. My mention of not putting in a large laundry trough but a small built in basin was met with concern that this might not suit say people who like to wash their pets in there or do hand washing.

Sink built into bench


Large laundry troughs
 

The homework is a bit of spring cleaning - to make a list of all the items you store in each room of your home with a view to where you use it and where it is stored. Also list what you use everyday, only sometimes and hardly never and then start to prioritise where the every days are stored so they are easy to get to compared to the hardly nevers.

I haven't done my homework yet I need a bit of time to go through each room but I will get there ... promise!

Week 1 you can read about here
Week 2 here
Week 3 here
Week 5 is all about Colour


[All renovation images my own. Other images via My Pinterest Laundry sinks 1, 2, 3, 4]

 
Pin It Now!

Saturday, September 1, 2012

Decorating In Spring Colours - Green and Yellow

Today is the first day of Spring and I've been decorating my TV cabinet and adding some pops of green and yellow to lure in the sunny Spring weather!


Starting with this retro styled lamp I grabbed the very last one at Target when they were half price at $55.

I had hoped the lamp shade would be larger and when I bought it imagined a large over sized one hanging over the couch but as it was smaller I thought it looked more in place behind the TV.


The 16 is our house number I bought from Typo for an outrageous $1 each.

I plan to put the numbers outside near the front door once the front fence and courtyard is built.


A mix of green vases brings out the rug colour - the tall one on the left is from Freedom and on the right Target and my quirky owl vase


Pops of yellow in the flowers bring out the art ... I am in love with all things yellow


My terrarium has had a break from the guest bedroom and looks right at home out here


It seems the cold Winter mornings are behind us now as we move into Spring it is such a pretty time of year.

I love changing up the colour pallete in this room.

Do you change your decorating colours in Spring?


 photo F0F68C01A59FABD46732FC15E1D8816D_zpsc6047f2f.png

For exclusive extras and daily updates ... follow Jarrah Jungle on Facebook, Instagram and Twitter


[All images my own]

Pin It Now!

Friday, August 31, 2012

Fridays Letters - Dear Roof Restoration

The Friday's Letters link up isn't happening at Adventures of Newlyweds this week but I'm still going to do my letters because I'm hooked I love to do a weekly recap of the happenings in my little world.
 
I'm imagining this weeks letters are written from this very flowery feminine home office and I'll be writing in my cute notebook and sipping on a freshly squeezed juice
 
 
Dear Roof Restoration - You are now finished and look bloody fantastic! I've had neighbors come and tell me the house looks brand new and they'd better start cleaning up their place! I'm more than impressed.
 
Dear Garage Door - Second time lucky you are now installed and locked up and secure. They say good things are worth waiting for and you sure look good to me.
 
Dear Cruise Holiday - You are less than 3 weeks away now I am ready for a holiday. I still need to buy some things from my wish list so I'd better find some time to hit the shops soon.
 
Dear Sunday Trading - It is embarrassing how far behind the rest of the world we are here in Perth but hooray for finally letting us go to the shops on a Sunday. I don't have to cram everything into a Saturday anymore so thanks.
 
Dear Mr P - For your Birthday this week we had cake, beer, pub meal, beer, movies in style la premier, and you guessed it more beers. Happy Birthday baby, you are the love of my life and I hope all your dreams and wishes come true.

 
[Image via My Pinterest]

Pin It Now!

Tuesday, August 28, 2012

The Largest Thing You'll Ever Paint

I thought I had it all figured out picking the exterior colours of our house until we had to pick the roof colour so the roof restoration guys could start work.

Let's face it the roof is the largest thing you'll probably ever paint! It's such a big area and grabs a lot of attention so we were a bit stuck on the colour to pick.

Since the major works to the exterior of our home over the last 6 months the icing on the cake is to get the roof restored, at a cost of $5000 and 4 days work this job involves replacing all the cracked tiles, rebedding and pointing, new gulleys, pressure cleaning the roof tiles, and finally painting the roof tiles so you'll never notice the garage extension and the mix of orange tiles amongst it all.

So what colour roof paint should we pick? So far these are our exterior colours ... 


The front of the house and inside of the garage were rendered a sand stone colour
and then painted in Dulux exterior Classic Cream
(not Limestone as I wrongly picked the first time!)


The down pipes are Classic Cream so they blend with the side of the house
They are not a feature so we didn't want them to stand out in a different colour


The gutters and facias are Ironstone which is a charcoal colour with a blue tinge to it
it really plays up blue in the sunlight


We asked the roof restorer to drop off a few painted roof tiles for us to choose from and we have narrowed it down to:

Tile 1 on Left: Left half Charcoal Right half Monument
Tile 2 in Middle: Barramundi 
Tile 3 on Right: Ironstone


Something to remember with paint colours is the material the paint is on will also affect how it looks - the metal gutter absorbs the colour whereas the ceramic roof tile is painted with a glaze so reflects the colour

The Ironstone tile against the Ironstone gutter
(Yes these are the same colour but look quite different don't you think?)


The only solution was to put the tiles on the roof to see how they would look in real life.

As feared, the Ironstone on the roof tile was going to give us a blue roof which is not what we wanted.

The greys looked a bit too matchy matchy like we didn't quite get the colour tinted right.

So the one that gives us the best and brightest contrast was Charcoal.


The Charcoal ironically is almost the same as the original roof colour and gives us a sharp contrast against the Ironstone and the Classic Cream walls.
 
 
I was a little worried about the dark colour heating up with the sun, as it is almost black. Although the roof is insulated we decided to get a Whirly Bird as well which we'll install once the painting is done. Whirly Birds are great for circulating the air in the roof space of your house - we bought the Edmonds Windmaster from Bunnings $98.

I can't wait to show you what it looks like all repaired and painted ... it's going to look like a new house!

Next job is to get the garage door guys to remake our door the right size and install.

 
[All images my own]

Pin It Now!

Monday, August 27, 2012

Interior Design Course: Week 3

Here is a recap of what I learnt in Week 3 of the Interior Design Course


WEEK 3
Kitchens Bathrooms and Laundries
Design Layouts
Finishes, Hardware and Fittings

The latest session covered Kitchens Bathrooms and Laundries the layouts for each room and types of finishes and hardware.

I was really interested in this session as we'll be renovating our Kitchen and Laundry next year and although we have renovated our retro purple bathroom late last year, since finding the perfect mirror we haven't yet put the final touches on (towel rail, another coat of paint on the ceiling, paint door frame and a new door and lock). So this session has inspired me to get our Bathroom finished once and for all!

We went through the different Kitchen styles and how important it is to keep the style of your kitchen to your home -  a colonial style home with an industrial kitchen just doesn't work. We were shown a heap of slides on what not to do – don’t go crazy and put in too many different materials and styles because it just ends up looking like a mix match! It’s also important for your appliances to line up so they look neat and pleasing to the eye.
 
Modern
 
Colonial
 
Industrial

We went through different Kitchen layouts, the kitchen triangle, and what to put where – the stove should always be on the back wall as it is the safest place. It was suggested to not go for a big walk in pantry but to put the food and items where you use them – put the baking paper, pots, etc next to the stove so your not running to the pantry and then the cupboards to find what you need. Admittedly I do this with my tea towels – I have to walk to the linen cupboard in the hallway every time I need a tea towel with dripping wet hands instead of keeping them right near the sink. These are all great ideas I’ll be taking into account when I do my kitchen renovation.


We had a guest speaker come in to talk about his kitchen cupboard products and passed around samples of the different kitchen bench tops, springs used in drawers, etc. 
 
We then went on a walking tour of the Home Expo to look at a few different kitchen layouts and to point out what worked with the design and what could be improved on – in one instance the sink was too low you would be bending over to do dishes, in another they changed the colour of the cabinets in an odd spot which made it look clunky and not flow. 
 
The homework was to cut out samples of different kitchen/bathroom/laundry bench top materials and integrated appliances. We also had to research energy efficient appliances but I was too slack to do that part!


The Bathrooms were covered quite quickly and again we were shown photos of bathroom layouts that could be improved on, the best types of materials to use in wet areas, different tiles and grout colours and the affects they have.
 
Modern
 
Colonial
 
Industrial

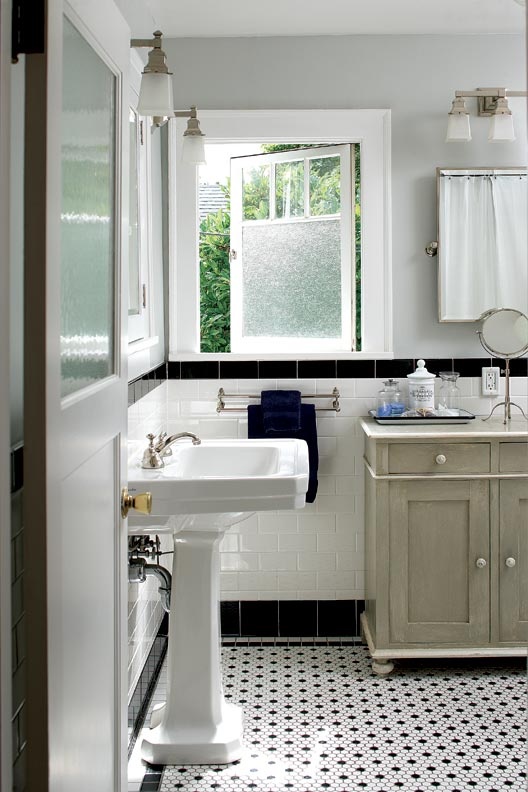
An important thing to remember when making rooms flow is to stick with a theme - if you are going to get a square basin then get square taps and handles and follow it through. So often you see round bowls and square handles and round taps and square shower heads and it just doesn’t work as well. I have been really careful with this in our bathroom which is why we have round bowls, round shower heads and round taps, round mirror etc.
 
Square Fittings
 
Round Fittings
 
Finally we touched on the Laundry which is often the smallest room in the house but it has so many functions. You need to think about what is important to you so you can get the quality of bench top and sink etc that suits your lifestyle. The point of storing what you need to use where you need it came up again, why put the ironing board in the laundry if you carry it into the living room each time you use it - try to store things close to the function is such a new way of thinking.


What I really like about this course is that we are shown what not to do and explained why it doesn't work so that we can start to see in our own designs what to do. It's like that TV show What Not To Wear I feel that you can teach style and still have the things that you love, but they need to blend and flow together and that is what makes great design.
 
Week 1 you can read about here
Week 2 you can read about here
Week 4 is all about Storage

[Images via My Pinterest - Kitchen Style Modern, Colonial, Industrial; Kitchen Triangle; Bathroom Modern, Colonial, Industrial; Bathroom Square, Round; Laundry 1 and 2 and My own images Homework 1 and 2]


Pin It Now!