Today I'm sharing part four of our honeymoon travels around the USA .....
After leaving New Orleans we jumped on a plane and flew direct to Las Vegas, Nevada where we stayed for four nights.
Now most people go to Las Vegas to get married, not on their honeymoon right! Well we had planned to catch up with friends in Las Vegas before we were even engaged and so true to our word we incorporated a stop off to Las Vegas in our honeymoon travels and I'm so glad we did we had so much fun here.

You are spoilt for choice on fancy hotels in Las Vegas there are so many to pick from.
I booked us into The Signature at MGM Grand which I'd booked through the owner direct on Air BnB at a great price. This was by far the fanciest hotel I have ever stayed in!
I booked us into The Signature at MGM Grand which I'd booked through the owner direct on Air BnB at a great price. This was by far the fanciest hotel I have ever stayed in!

Days 1 and 2 - The Strip
Las Vegas city area is crazy, with people everywhere, drinking and partying on the streets, shops and restaurants galore, it really is all lights, party, action here! Unlike Australia, you can buy alcohol in the supermarket here and then drink it in the street and go inside the casinos with it - talk about a cheap night out!
Each night we walked along The Strip and checked out the different casinos, you could spend hours at each just admiring all the art displays, the shops, restaurants and bars. If I had more time I would have spent just one night at each Casino whereas we ventured to a few each night so we could see them all and there are still some we didn't get to so that's a good excuse to go back one day!


So many people going up and down The Strip it's worthwhile stopping at a bar for a drink with a view and watching the world go by.


Day 3 - Downtown - Old Las Vegas
We took the local bus Downtown to the old Las Vegas for some shopping at the North Premium Outlets and got some great bargains on clothes, shoes and jewellery.
In the afternoon we caught up with friends staying down here and watched some live bands, we had an amazing day and night Downtown, it has a much more relaxed and friendly vibe here and I would say more family friendly as well.
I would happily go back to Downtown again and recommend everyone visit this side of town!
I would happily go back to Downtown again and recommend everyone visit this side of town!


Day 4 - Grand Canyon
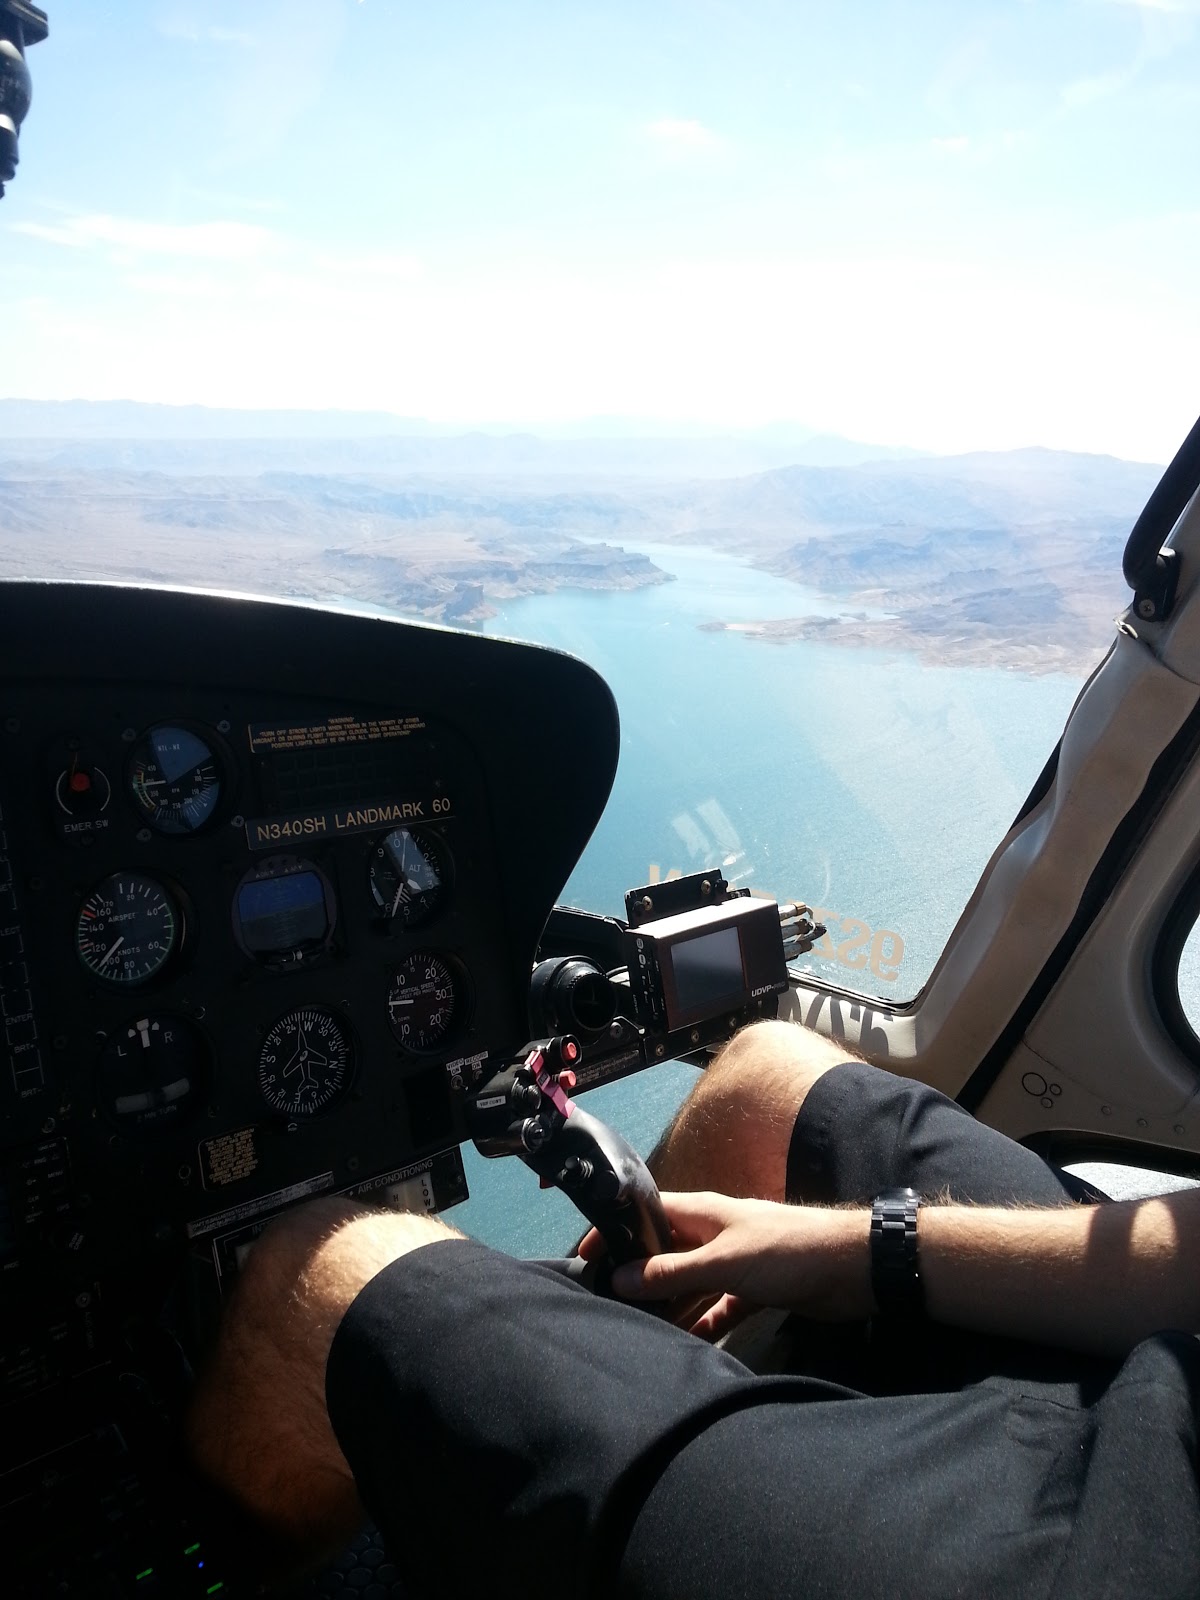
At it's doorstep is the Grand Canyon which you can do a full day trip by bus or a helicopter ride takes 45 minutes to get there - as time was limited we went for the helicopter! This was one of the highlights of our trip.
We went with Sundance Helicopter Tours - Grand Canyon Picnic which included a limo picking us up and dropping us back to our hotel.
At the air strip which was just out of town, we boarded a small helicopter and being newlyweds Mr P and I got the prime seats in the front next to the pilot while 4 others sat in the back and we were up and away. This was my first time in a helicopter and it was a little noisy and scary but I did love it and the views were breathtaking going over The Strip and into the Grand Canyon, over Hoover Dam, Lake Mead and the Colorado River.
We landed and had a short stop on top of the Grand Canyon, enjoyed a picnic lunch and glass of bubbles, and then hopped back on the helicopter and made our way back to the air strip, except this time we sat in the backseat which was less scary than the front seats!


After this adventure, we went to the art gallery of my favourite artist Michael Godard known as the rock star of the art world and who I have admired for many years for his paintings full of personality and fun.
We purchased a stunning piece of art (Prepare The Perfect Pour pictured below) as a wedding gift from the wishing well at our wedding and when I sent out our wedding thank you cards I let everyone know that we'd purchased some art on our honeymoon in Las Vegas which they loved knowing what their contribution went towards.
We purchased a stunning piece of art (Prepare The Perfect Pour pictured below) as a wedding gift from the wishing well at our wedding and when I sent out our wedding thank you cards I let everyone know that we'd purchased some art on our honeymoon in Las Vegas which they loved knowing what their contribution went towards.
It took 3 months to receive the art and art book back home in Australia as it was being signed by Michael Godard - while it took much longer than expected I am so happy to have this memory of our honeymoon hanging proudly on our walls at home .... I don't think it will be my last Michael Godard art piece either!


After I had spent time being lost amongst the art - it was Mr P's turn to have some fun.
Mr P has become rather obsessed with pinball machines (in fact we now have two life size pinball machines at home in the man cave!).
So we just had to check out the Pinball Hall Of Fame for a couple of hours of fun and games. If you're into pinball or travelling with kids, I highly recommend you save up your coins and check out this place for a couple of hours of good ole fashioned fun!
We also played Pinball in NYC where you paid per hour whereas this place you need to bring coins to play each game - there were a lot more pinballs and different types of machines from all different eras from retro to modern in the Pinball Hall Of Fame.


The food here is more modern American style - burgers, pizza, steak, chicken wings (at Hooters another place I just had to check out!).
We found the food to be a lot more expensive compared to the other places we visited, but it is a very touristy place and so that's to be expected I guess.
I would love to go back here with a group of friends for a week to see more of the Casinos, shows and entertainment. I would also like to explore the National Parks and more of the Grand Canyon around this part of the world .... next time!
Have you been to Las Vegas? What did you love about it?
Check out my other honeymoon travels around the USA here:
Honeymoon destinations in the USA
Tours around the USA
Part 1 - New York
Part 2 - Louisville, Kentucky
Part 3 - New Orleans, Louisiana
Part 4 - Las Vegas, Nevada
Part 5 - San Francisco, California
Part 6 - Los Angeles, California

[All images my own]
Pin It Now!


