Related Posts Plugin for WordPress, Blogger...
Showing posts with label garage. Show all posts

Thursday, March 9, 2017

DIY: Painting + Sealing The Driveway

We have come a long way in updating our house exterior over the years - here's a flashback to what our driveway looked like before when we first bought the house.


After we had a new driveway laid it was a million times better and safer to drive and walk on .... Plus we built a garage, rendered and painted the bricks, roof restoration, built a courtyard garden, sheesh we've made some changes out here!


But we were a bit slack and didn't seal the new driveway straight away and so it has faded a bit in the harsh summer sun and suffered a bit of wear and tear. So we thought we had better seal it to protect it from the weather and any stains and marks from leaking cars and also to inject a bit of colour back into it by using a sealer tinted with colour.

We used a Crommelin Sealer in Enhance Satin with a Basalt colour additive which tinted the sealer a dark charcoal colour. This is an industrial strength sealer which resists oil and grease so is perfect for the driveway. 

We sealed one side of the driveway and then on our next free weekend (a month or so later!) we did the other side of the driveway. This way we could still park our cars and walk on one side whilst the painted side was curing.


To seal a driveway you need to clean the surface well first and for this we used our pressure cleaner to hose off the driveway and scrubbed off any heavy marks and stains. When it was dry we went over it with the vacuum to remove any bits of sand left behind. Once it was nice and clean it was ready to be sealed. 

To apply the sealer which is like a thick paint Mr P used a paint brush to cut in along the edges and then a paint roller on a pole to paint the rest. We bought a cheap brush and roller so we could throw them in the bin afterwards. We did two coats leaving it to dry overnight between coats.


We spent under $100 on the sealer, paint brush and roller which makes it a pretty inexpensive DIY.

Painting and sealing the driveway has added a new lease of life to the concrete and it makes a great first impression to the front of the house.

Have you tackled any DIY projects around the house lately?


 photo F0F68C01A59FABD46732FC15E1D8816D_zpsc6047f2f.png

For exclusive extras and daily updates ... follow Jarrah Jungle on Facebook, Instagram and Twitter


[All images my own]

Pin It Now!

Wednesday, July 20, 2016

DIY: Painting The Eaves Around The House

I am happy to report that Mr P and I did our last lot of exterior painting of the Jarrah Jungle home the other weekend and finished painting the eaves around the front of the house.

We have painted every part of our exterior from the rendered brick front and back and sides of the house and the window frames (we painted these twice ... the first time white and then a few years later a charcoal colour).

The old fibro asbestos eaves we had removed and replaced with fibre cement sheets when we did our garage extension about 4 years ago. We painted the back and side eaves when we painted the back of the house but we hadn't gotten around to painting the front eaves ... until now!


To finish off the eaves Mr P had some scotia that he cut to size on an angle using the power saw and then secured to the eaves with a nail gun. The scotia fills the gap between the brickwork and ceiling and makes it look neat and tidy.

Any nails that were sticking out Mr P hammered in so they are smooth and then used a putty to go over the nails so you couldn't see the nail heads.

The eaves and scotia were then ready for painting.


To prep the eaves to paint we used a broom to clean off the cobwebs, bugs and dirt and then used a dry rag to give them a good wipe over to make sure they were clean.

We laid drop sheets down and only used painters tape for the garage door area and the rest of the eaves Mr P painted free hand with a patient hand, an angled brush and a wet rag to wipe up any drips and slips as he went.

Now for the type of paint we used Spring Flat Plastic Paint in white - it is a really inexpensive paint (we picked up 4 ltrs from Bunnings for under $15). The odour is a little strong but as we were painting outside it didn't really bother us. It is a plastic type paint so it will take forever to mix properly by hand so I suggest you use a paint mixer like the one I'm using below - simply attach  the mixer to a drill and use the drill to mix it and it's ready in just a few minutes. 


That's it once the prep work was done we were ready to paint .... Mr P as always was the cutting in master and I'm the roller girl waiting for my turn to follow with a roller. I am very grateful to whomever invented the painting stick or I'd never be able to reach the ceiling!

We painted on one coat and then waited a few weekends (due to the wet weather) until we could get out there and do the second coat of paint.


What a difference a nice fresh coat of white paint makes. 

But wait that's just the first coat you always need to do two coats to get a nice even coverage. But the good news is the second coat always goes on much quicker and easier.


It's almost a bittersweet feeling knowing that we have almost finished our Jarrah Jungle renovations ... how will we spend our weekends when we don't have things to paint!

Have you done any painting around the house lately?

I have added our painting projects big and small to my Projects Page which you can find here


 photo F0F68C01A59FABD46732FC15E1D8816D_zpsc6047f2f.png

For exclusive extras and daily updates ... follow Jarrah Jungle on Facebook, Instagram and Twitter


[All images my own]

Pin It Now!

Monday, June 20, 2016

Subdivision Update: Planning Retaining Walls + Dividing Fences

Since my last update on the subdivision of our block once we finished clearing the land we had the surveyor back to measure and peg out the two new sized blocks - our new backyard for the front house and the new subdivided block.

The next step is to build retaining walls and fences around the two new sized blocks and when that's done that will finalise the subdivision and our local council will issue us with new plans and title.

With dividing fences and retaining walls you need to co-ordinate with your neighbors and come to an agreement about cost sharing, materials, etc and this is where it got a little tricky for us .... We have spoken to our neighbors on all three sides of our boundary and wrote nice friendly letters to them, attaching quotes and asking to build retaining walls and new fences and split the cost between us. But unfortunately we haven't had the go ahead from all of our neighbors ...... Bummer!


We got the go ahead from our neighbor on the right side who is also subdividing their block and happy to go halves in the cost of a limestone retaining wall, removal of the old fence and installing a new dividing fence.

We have started work on this over the weekend with the old fence being removed and a limestone retaining wall being built (this is the high side of the land where we built a garage). The retaining wall will join up with the brick garage wall and follow it down to the back fence. A new fence will be installed on top of the retaining wall this week.


The neighbor on our left side agrees we need a new dividing fence but we haven't yet decided on the type of retaining and fence. We are sourcing further quotes and options and hope to come to an agreement soon.

As you can see this fence is really old, made of asbestos and falling down - I can't wait to replace it!


The neighbor on the back fence has a newer cement fence and has agreed we can put in a new fence and retaining but at our own cost and has put some conditions on how we go about it. We have considered this further and decided to leave this fence alone as it's a newer fence, in pretty good condition and in the right position so we don't need to retain or put in a new dividing fence here. This will save us quite a bit of money too! 

Because we are perfectionists we will probably paint this fence in classic cream so that it matches our new cream metal fences.


For the fences we are going for Colorbond metal fence panels in a cream colour to match the exterior colour pallete of our home. Below is a close of up the pattern and colour.

We have a local company Pillar To Post Fencing installing the fences.


For the retaining wall on the high side we are going to use limestone block retaining to match the foundations of our house and the front courtyard we built - whilst limestone blocks are the more expensive option it will look really good, it's quality and will last a lifetime. We have P+P Stone Solutions who built our front limestone courtyard doing this work for us.

Being able to split the cost with neighbors is really good but firstly you have to agree to what you want. So fingers crossed we can get our neighours agreement soon!

I'll share a progress post on the new retaining wall and fence going in very soon!


 photo F0F68C01A59FABD46732FC15E1D8816D_zpsc6047f2f.png

For exclusive extras and daily updates ... follow Jarrah Jungle on Facebook, Instagram and Twitter


[All images my own]

Pin It Now!

Wednesday, July 8, 2015

Organising The Garage: With Wall Rails + Hooks

As part of our subdivision plans we need to remove our Granny Flat so earlier this year we moved everything out of storage of the Granny Flat and into the garage.

Now we need to organise all that stuff and store it properly ..... a place for everything and everything in it's place!

We started to get organised over the Easter break and assembled two of these heavy duty shelving units along one wall for our camping gear, paint and renovating supplies etc.

The shelving units are perfect for the garage and fit a heap of stuff but we still needed a storage solution for our gardening tools, mops and brooms etc.


We found the StorEase system from Bunnings would suit us best - it has wall rails and different types of hooks and baskets that clip on depending on what you need to hang.

We installed the wall rails on the wall opposite the shelving units so that all the items are stored in one area which leaves all the other walls and garage space free for the cars.


We used 4 wall rails in total - 2 on the top and 2 on the bottom and we joined them up so they look like one long rack. 

Using a level to make sure the rails were straight, Mr P drilled a few holes into the rendered walls, added plugs and then screwed the rails in.


Now for the hooks, this is a really clever set up as you can buy different size and shaped hooks depending on what you want to hang - there are hooks for everything from bikes to fishing rods.

We stuck with the double hooks as they are perfect for the gardening tools and the hooks are big enough that you can hang multiple things on each hook too.


The hooks just slide onto the rail and you can move them around so they fit around other things that are hung.

We fit 4 hooks on each rail but there's room for more - we got 10 hooks to start with and then went back and got 6 more so we used a total of 16 hooks in the end.


As for the cost - the racks were $26 each ($104) and the hooks $10.40 each ($166.40) and so we spent $270 all up.

It was money well spent to have everything neat and tidy and easy to access when we need it.


Best of all everything is now off the floor and out of the way, now I can walk into the garage without having to worry about stepping over everything and knocking things over!

That's another weekend DIY project ticked off the to do list!

How do you keep your garage organised? 


Sharing with link parties:
Curly Crafty Mom - Motivational Monday
Savvy Southern Style - Wow Us Wednesdays
The Dedicated House - Before And After Wednesday

 photo F0F68C01A59FABD46732FC15E1D8816D_zpsc6047f2f.png

For exclusive extras and daily updates ... follow Jarrah Jungle on Facebook, Instagram and Twitter


[All images my own]

Pin It Now!

Friday, June 5, 2015

Courtyard Progress - AliTimber Fence Slats + Gate

Finishing the courtyard fence around the front of the house has been on our to do list forever and I'm so happy to finally have some updates to share as the last few weekends we've been working on it.

Let me take you back to when the limestone courtyard was built over 2 years ago now .....

The courtyard was approved by Council in March 2013 and then it was built in October 2013.


Once the limestone pillars were built we then debated on whether to use wood or metal fence slats between the pillars. 

We worked out the pros and cons of both and wood was going to be about the same price and would need ongoing maintenance. Whereas metal would need no maintenance, it is stronger, and easier to install, so in the end we couldn't resist the metal option.

When I say metal I mean aluminium which is powder coated in a wood grain look finish. It also comes with a 10 year warranty, what's not to love about that!


We got samples from metal fence companies around Perth to try to get a colour match for our jarrah garage door. 

This is where we came to a grinding halt because we couldn't find the right colour - there were various shades of jarrah but none that matched the garage door. 

So we put this project on hold and went on to renovate our kitchen, dining room, laundry and powder room.


Once we got approval to subdivide our block late last year, we knew we had to get a move on and finish the front courtyard and add some kerb appeal to the house. 

So we resumed our search for the right coloured jarrah fence slat again.

We found a pretty close match from Awards Fencing who stock AliTimber and decided to just go for it, especially when we managed to save almost $1000 to what we were quoted the previous year! 


We ordered a slatted gate which they made to size, as well as the gate posts, end caps, hinges and handle.

The fence slats are a DIY install so we had to work out how many lengths of fence panels we'd need for the courtyard, as well as channel extrusions and end caps.

The fence slats come in 5.8 metre long lengths and 3 different thicknesses - thin, medium and large - we went for the medium size which is 65 x 15.


The gate and metal slats were delivered within days and they were packaged and wrapped really well to protect them from marks and scratches. I was so impressed with the packaging, there was even plastic wrapped between each slat, so there was no way they would scratch.

The reason for the packaging is the slats scratch quite easily and we had to be very careful with nails and anything metal as we were installing them, we made a few marks on them but heard a tip you can hide the scratches with shoe polish so we'll give that a go!

The packaging made cutting the fence slats a lot easier too as we kept them wrapped and cut 5 at once which saved us a heap of time!


First of all we hung the gate, as this was already made to size it only took a couple of hours to fix the gate posts to the brick, install the hinges and hang the gate. 

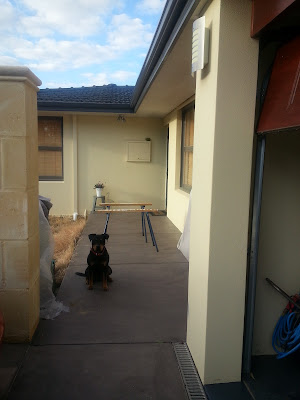
As you can see Lexi is getting excited about having a whole new playground to hang out in!


Because we rendered the bricks of the house we didn't think one gate post would screw into the brick very deep due to the render/plaster on top, so to be safe we attached two gate posts together for extra strength and depth. 

We screwed the double fence post into the brick wall, attached the hinges to the gate, and then hung the gate from the posts. 


It already feels more secure and private with the gate on which is what we wanted. 

I want to put a door buzzer on the gate so we can lock it and anyone that wants to come in will have to buzz us to be let in! 


So that's about all for today's blog post, as this one is already very long (well done if you've made it all the way to the bottom here!)

Next I'll share the install of the fence slats to the courtyard. We are still finishing this after working on it over the long weekend we hope to finish it off this weekend.

What do you think of the AliTimber - can you believe it's not real jarrah?


Sharing with link party: 
Curly Crafty Mom - Motivational Mondays


 photo F0F68C01A59FABD46732FC15E1D8816D_zpsc6047f2f.png

For exclusive extras and daily updates ... follow Jarrah Jungle on Facebook, Instagram and Twitter


[All images my own]

Pin It Now!