Related Posts Plugin for WordPress, Blogger...

Tuesday, July 30, 2013

Indoor Bench Seats - Yay or Nay?!

I've been hunting high and low for bench seats to go with a dining table for our soon to be finished dining area but I'm still unsure of exactly what will work in the space. I had visions of a funky bench seat piled with cushions for along the wall and a dining table that can be pushed right up against the wall with the bench seats sitting neatly underneath and pulled out when we need extra room.
 
Unfortunately all the bench seats I've found look a little outdoorsy which is not the style I'm going for - I want a bench style but something that's comfortable to sit on for long dinners over lots of wine and conversation! Here's a few that I've found but I'm not convinced I'm on the right track with the whole bench seat idea ...
Freedom Furniture Brunch set $799
Freedom Furniture Boulder set $1799
  
Ikea Sigurd Red Bench $149


The Chair and Table Warehouse Perth - Replica Barcelona Bench
 
The Chair and Table Warehouse Perth - U Bench

I'm beginning to wonder if the idea of this style of dining is really the right choice after the round up of bench seats I've found so far. It is a great space saving idea but when it comes to finding something that is going to look good along side my shiny new kitchen that has proven to be a little more difficult to come by.

What do you think about bench seats for dining - Yay or Nay?

 
[Images via Pinterest 1, 2, 3, 4, 5 - find me here]
 
Pin It Now!

Monday, July 29, 2013

Trojan Tools - Product Review And Giveaway

The friendly folk at Trojan Tools sent me some tools to review which we tried out over the weekend with the kitchen renovation.

Trojan are an affordable low-mid range brand aimed towards home renovators, DIY enthusiasts and light trade use. They are an Australian brand stocked at Bunnings where you'll find us most weekends stalking the aisles for everything DIY or at the hot dog stand getting lunch!
 
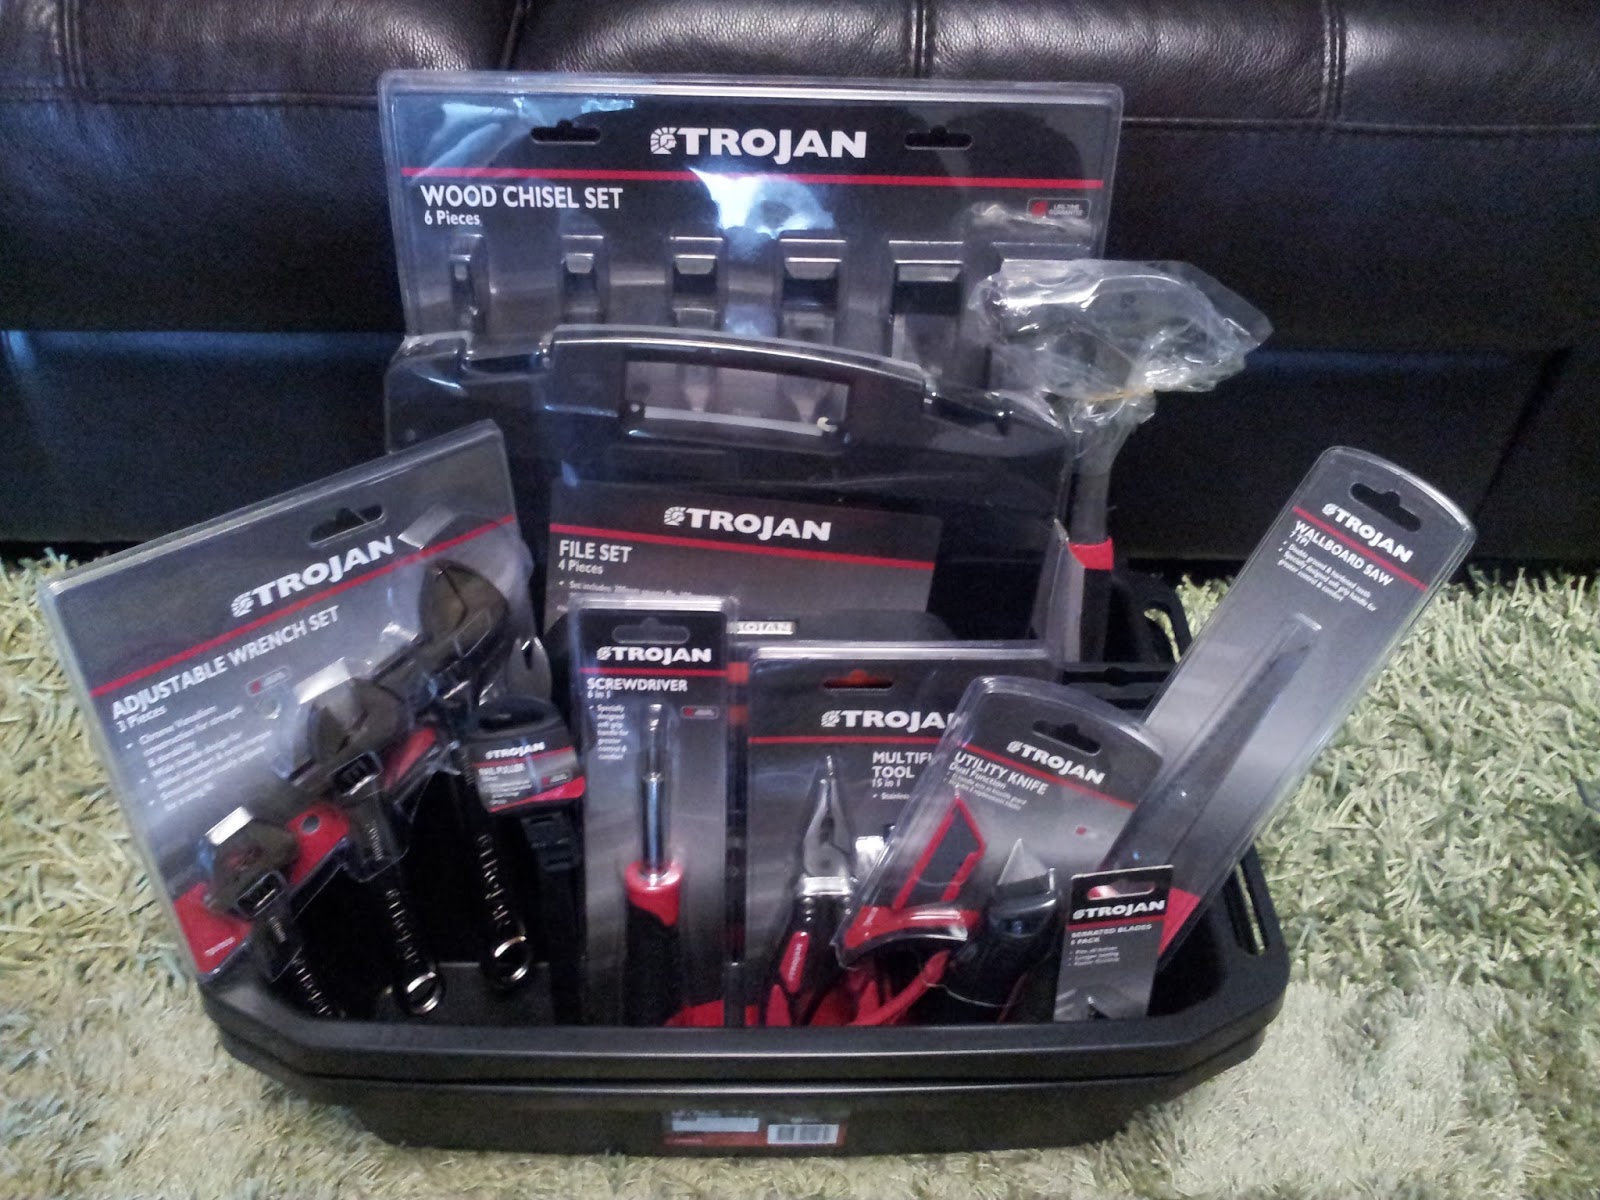
I received a Trojan tool tote with a selection of their household tools including wood chisel set, file set, multi tool, 5 in 1 screwdriver, adjustable wrench set, wallboard saw, hammer, utility knife and nail puller which will definitely come in handy for our ever growing list of DIY projects - plus I now have my very own tool tote which I'm pretty excited about!
 
Trojan tool tote
 
I also received some plastering tools that we could use to tackle the plastering job in the kitchen and dining room - a notched trowel, small plasters tool, hand sander, sand paper and sanding sponges.

Trojan plastering tools
 
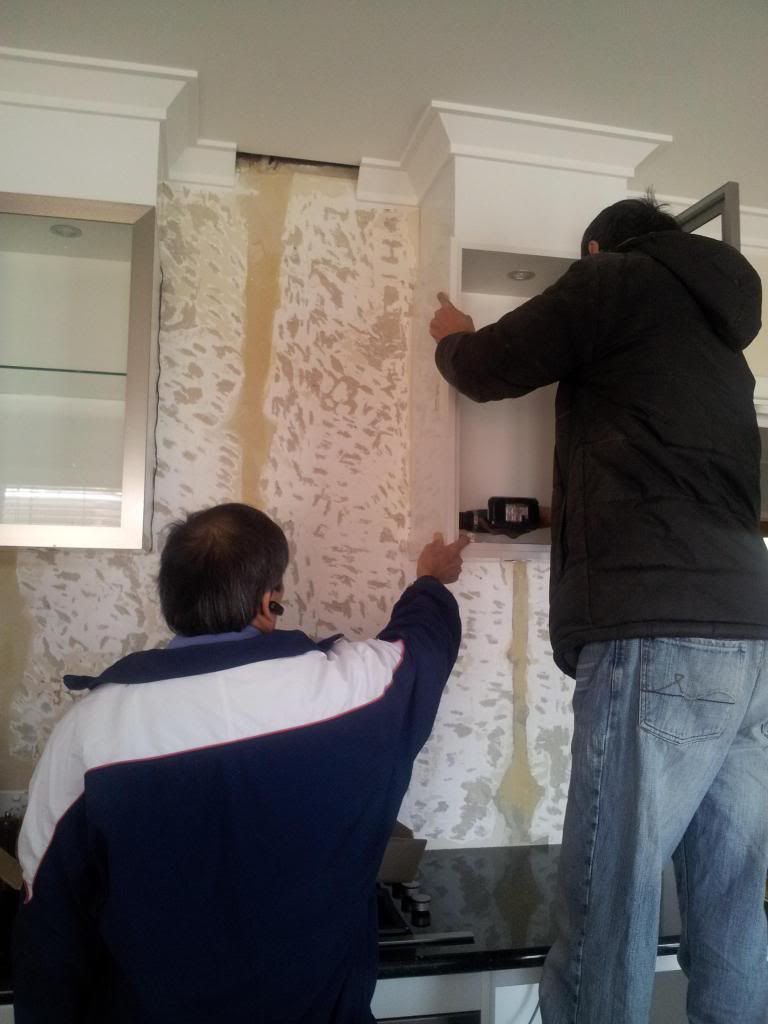
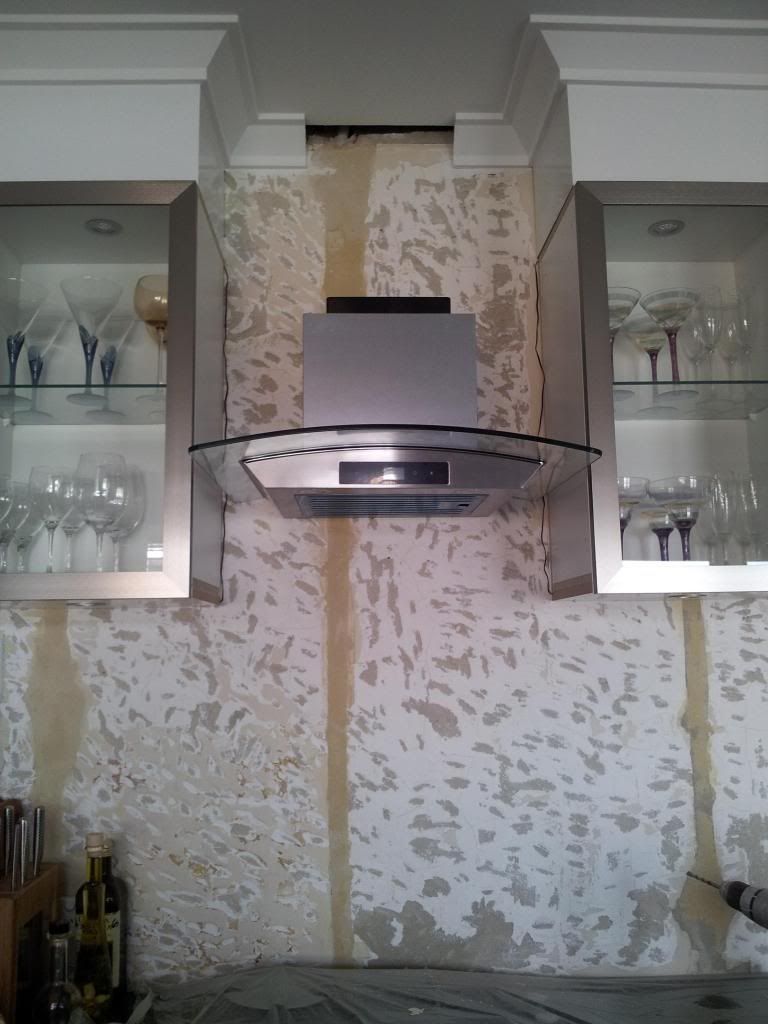
We tried out some of these tools doing the final stages of the kitchen renovation - prepping, plastering and sanding the walls and window and door frames in the kitchen and dining room to get them ready for painting.

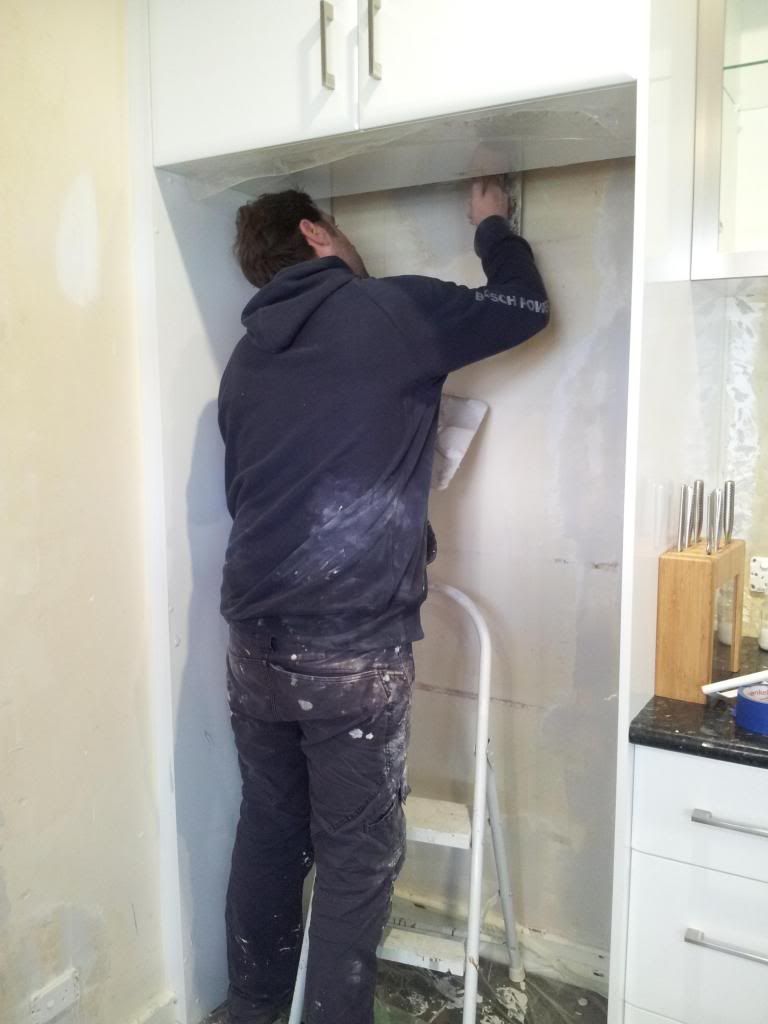
Plastering "white set" the walls

We used the small plasters tool which has a triangle on one end and a square on the other end and because of its size is really good for those hard to reach places when plastering like the walls alongside the door frames and window frame.

Loading up the small plasters tool

Small plasters tool

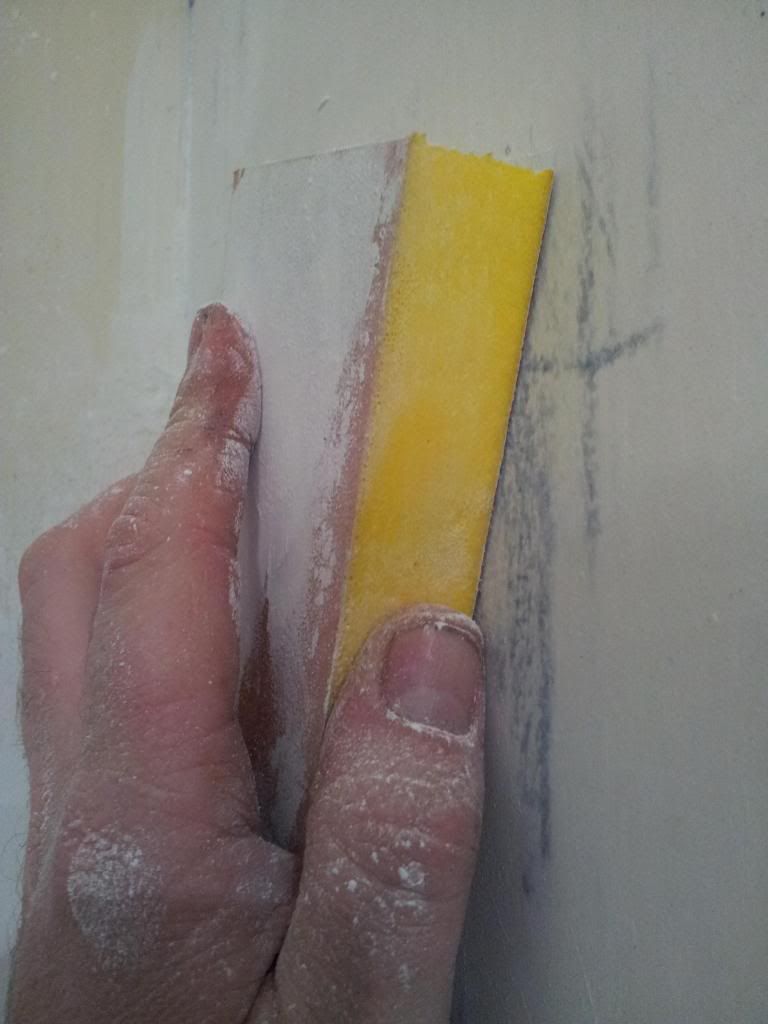
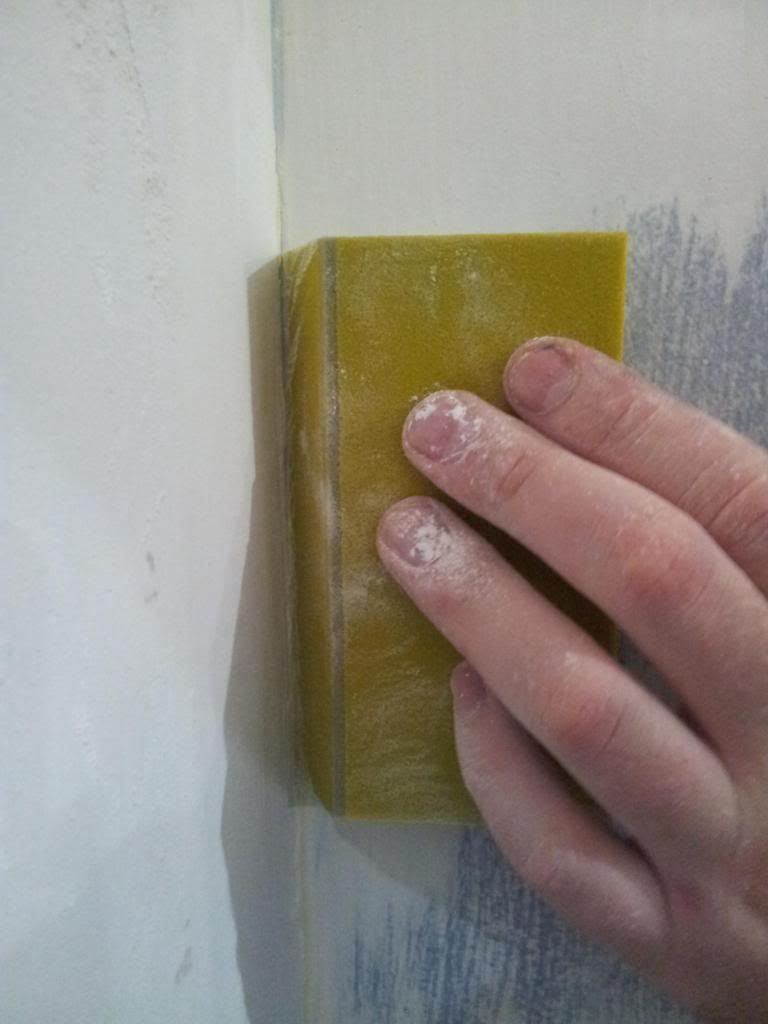
Once the plaster was dry, the next day we got stuck into the sanding to get the walls ready for painting. That's where the hand sander comes into play - the slotted sanding sheets were easy to fit into the sander and pre-cut so no fiddling around cutting sheets of paper to fit. The handle feels really nice in your hand and has a soft grip. We used this heaps it gave really good coverage and allowed us to sand the large areas pretty quickly. 

Working the hand sander

We had a variety of sanding sponges in different grades from rough and fine. They felt firm but spongy in your hand and were really good to work with. They work substantially better than a block of wood with a sand paper sheet wrapped around it which is what we usually use ... will definitely be stocking up on these bad boys!

Sanding sponge
The other thing that was good about these sponges is you can just rinse them out when the pads get full from sanding and they come up clean just like new and you can go back and sand again. We sanded for a couple of hours and they barely wore out and made the job of sanding the 3 door frames and window frame so much better.

Running water over the sanding sponge

Cleaned and good to go again

Of the sanding sponges, the angled sander was the favourite because it allowed you to get right up close to the edge of the door and window frame or into the corners of the room without knocking your knuckles. A very clever design this one!

Angled sanding sponge

The other tool we used quite a bit was the utility knife which comes with 5 spare blades. Admittedly the safety catch worked a little too well as the blade kept retracting when you pushed too hard but other than that it worked well.

Utility knife

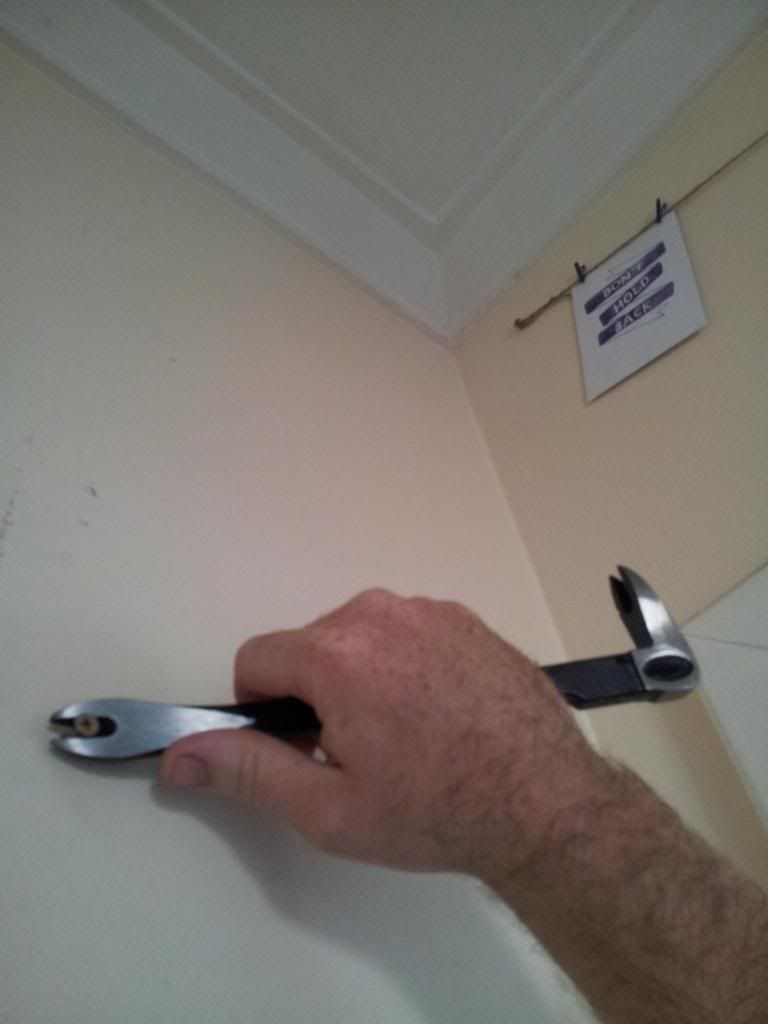
We also used the nail puller to pull out all the hooks and nails in the walls so we could plaster. This was the perfect size to work with and had good leverage as it wasn't too big and clunky. I wish I had this when we were restoring the floorboards and pulling out wayward nails!

Nail puller

These tools certainly did the job - the plastering is all done, the walls are sanded smooth and we are now ready to paint so I would call that a successful renovating weekend! Overall the tools were easy to use and good quality and I would recommend them to anyone who likes to tackle odd jobs and repairs around the house and DIY and renovating enthusiasts.

Thanks to Trojan I have a DIY Survival Kit with Trojan's top 10 tools for the tool shed valued at $140 to giveaway. Ladies, if you don't know your spanners from your wrenches why not try to win this for your husband, boyfriend, dad, brother, or tool enthusiast!

The Trojan Tools DIY Survival Kit up for grabs includes:
Combination Square
Tape Measure
Allen Key Set
6 in 1 Screwdriver
Combination pliers
Claw Hammer
Utility Knife with retractable blade
Wood Chisel set
Adjustable Wrenches set
Tool box with built in compartments and lift out carry tray


For your chance to win:
1) Follow Jarrah Jungle here or on Bloglovin here
2) Like Jarrah Jungle Facebook page here
3) Then leave a comment here or on my Facebook page so I know you've entered
4) Bonus entry if you share this post on Facebook or Twitter - leave another comment here or on my Facebook page for a second entry
5) Giveaway open to Australian Residents only
6) Giveaway ends on Friday 2 August 2013, 5pm WST

Winner will be drawn at random and announced over the weekend ... Good luck everyone!

Disclosure: Trojan Tools partner with bloggers such as me to help promote their product. As part of this promotion I was invited to pick products to review and given a tool tote to keep and a tool box to giveaway. I have not received any payment or compensation for this review. I have not been told what to say about this product, I am free to form my own opinion and share them in my own words. All opinions are my own. Prize will be posted to winner direct from company. This prize cannot be exchanged for money.


[All images my own]


Pin It Now!

Friday, July 26, 2013

DIY Herb and Garlic Infused Oil

When I was unpacking all my kitchen stuff over the weekend I came across some bottles I'd kept to reuse and thought one would make a nice looking oil bottle. Herb infused oils are so easy to make and over time the flavours develop more and more and add that extra bit of aroma to your cooking.

Last time I made a chilli, garlic and herb oil the bottle was so big (it was a sangria wine bottle) that by the time the oil was finished it was really really really hot from the chilli's! This time I picked a smaller bottle and left the chilli's out.
 
Once the bottle was washed and dry I filled it with some black peppercorns, a few cloves of peeled garlic, fresh herbs I had on hand from the garden lemon thyme and oregano and extra virgin olive oil.


It's not recommended to keep fresh herbs and garlic in the oil for long due to water they can retain so we'll be sure to use this up pretty quickly in our cooking, salad dressing and dipping oil with freshly baked bread I plan to make on the weekend.

Have you made infused oil before?
What's your favourite flavour combination?

[All images my own]


Pin It Now!

Tuesday, July 23, 2013

Book Club: The Great Gatsby by F Scott Fitzgerald

The July Book Club read was the movie of moment The Great Gatsby by F Scott Fitzgerald.

The variety of book covers is a dead give away of just how popular this book is, although I couldn't find an image for the cover of my book which I borrowed from a friend who bought it over from Ireland.

 
The Great Gatsby is a story based in the 1920s in New York City after the war. The main character Nick moves to NYC and lives next door to the wealthy and much talked about Jay Gatsby who is mostly known for his wild parties and other unfounded rumours that surround the rich and famous. The story is based around Nick and a group of young men and women he meets and their life and love affairs.

I had to really try to envisioned how it must have been in those times because the book didn't describe in enough detail to paint a proper picture of the characters and the story. I never felt a full connection and bond with Nick or the other characters and I found the affairs and stories hard to follow and the attempt at a love story lacklustre and unconvincing.

I think because of all the hype with this book being made into a movie I expected more from it and was left quite disappointed.

I recommend this book to American history enthusiasts in particular the 1920s and 1930s era.

I give this book 2 stars
 
Jarrah Jungle's Star Rating:
1 Bad - I'd rather eat brussel sprouts topped with anchovies than read this again
2 Not Good - I'd rather watch re-runs of Neighbours than read this again
3 Ok - I'm sitting on the fence - its not great but not terrible either
4 Good - I'd pass up a pack of tim tams for this read
5 Great - I'd pass up a date with Johnny Depp for this read
 
 
[Image via The Library Thing - Book can be purchased at Random House Australia]
 
Pin It Now!

Monday, July 22, 2013

Picking A Glass Splash Back For The Kitchen

After much deliberation about the material for the kitchen splash back - tiles Vs glass and our unsuccessful tile shopping expedition we have decided to go for a glass splash back and can you believe it we have even managed to pick out the company and colour which means we are just weeks away from having a shiny modern splash back installed .... oh happy days!

We got 2 quotes from 2 local glass companies, the first was from Modern Glass who we used for the glass in the french doors and the other from WA GlassKote who were recommended by a friend who used them for their kitchen splash back.
 
Modern Glass we visited their showroom and even though they were the cheapest at $1500 there would be more joins in the glass and we couldn't decide on a colour from the samples we took home.
 
Modern Glass colour range
 
GlassKote came out to the house and did a quick measure and quoted $2100 but with no joins in the glass and I liked their colour range better which was designed by a local Perth interior designer. Unfortunately GlassKote were too expensive and we told them we liked their product and would like to go with them but they would need to bring their price down and after a bit of negotiating they reduced it to $1500. So in the end we got a price match with no joins and the colour we liked - can't complain about that!
 
I've said it before and I'll say it again - always ask for a better price!
 
Modern Glass and GlassKote colours narrowed down to the favourites
 
Let's compare costs - while we're on the tile Vs glass splash back debate as this was a question I had which I couldn't find an answer for.

The mosaic tiles we found would have cost approx $900 just for the tiles and then on top of that you need to pay for grout, hire/buy a tile cutter, and a weekend of your time if you're handy and want to give it a go, or pay a tiler to lay them. When we did our bathroom renovation, the tiler's labour cost twice as much as the actual tiles so this would have been a more expensive option in the end. Of course picking cheaper tiles and doing the tiling yourself would bring the cost down.

For $1500 we're getting the glass product and it will be professionally installed and ready to go. Cost wise I think the glass has worked out a bit cheaper (thanks to our negotiating skills!).

The mosaic tile we were thinking about buying
 
Types of glass - there are 2 types of glass Classic which is plain glass and Clarity which has a bit of a sparkle in it - we chose Clarity of course what girl wouldn't pick a bit of sparkle!

Classic plain glass and Clarity sparkle glass
 
As for colours - while I loved the dark teal Isobar and red Flame Red I think they will be too dark against the black granite bench tops and there isn't enough light in the room to get away with it. So we tried to pick out one of the colours from the shells in the granite so silvers, blues and greens and ended up with this blue/silver one called Frosted Ice.
 
Isobar and Bright Silver
We have a winner ... Frosted Ice

Getting it ready for install - so the splash back can sit flush and as close to the glass overhead cabinets and ceiling cornice as possible I fluttered my eyelashes at the kitchen guys and as a favour for the delay with the kitchen install asked them to take the end panels off the glass overhead cabinets and shave off 10mm and then redo the edging so the splash back can be fitted and then the panels can go back on. Of course they said yes ... I have pretty long eyelashes ;-)
 
Kitchen guys removing the side panels off the glass cabinets

Side panels off and ready to be taken to the work shop to be modified

Range hood holes and power points - we also needed to drill the holes into the wall for the range hood so the splash back guys can come and do a final measure which includes cutting out the range hood holes and around all the power points.

We decided to hang the range hood slightly higher than recommended at 800mm instead of 750mm because Mr P is quite tall and it's better for him to not hit his head every time he cooks and let out a bunch of expletives! It will mean the range hood doesn't extract at the premium range but for the convenience of it being at the height we want I don't mind that. That's the good thing about renovating you can customise things if you want to suit ... right down to minimal swear words!

Range hood brackets installed so they know where to drill holes in the glass splash back

We are hanging the Range hood slightly higher than recommended
 
GlassKote are coming tomorrow to do a final measure and then it will take them about 2 weeks to make the splash back and then they'll come back and install which apparently takes them just an hour.

It is going to look so freaking amazing when the splash back goes on .... oh happy days!

What do you think of our glass colour choice Frosted Ice?

For updates on the kitchen as I go Like Jarrah Jungle on Facebook and you'll never miss a thing!

 
[All images my own] 


Pin It Now!

Friday, July 19, 2013

Our Rescue Dog Lexi 6 Months On + Still The Shy One

We've had our fur ball Lexi for 6 months now ... I still remember the first day we bought her home and it taking us almost 2 hours to coax her out of the car!

Lexi is a little damaged from her abusive home we rescued her from and is still pretty scared and timid when we introduce her to new people or loud noises like laughter or clapping. But giving her lots of time to adjust and all my friends and family who have been so caring and sweet and patient with her she has come a really long way and keeps gaining confidence with each day.

Dog toys last less than an hour before they are chewed and destroyed just like our lawn!

We have a new ute now with a back seat just for her but she still sits on the floor curled up in a ball .... loving being out and about but not being brave enough to stick her head up and look around.

She's had doggy dates and been out to Kings Park and the Swan River.

She loves being around other dogs and playing chasey ... like most girls she likes to be chased not to chase!

This is how Lexi sleeps curled up into a tight little ball!

On our weekend away Lexi had her first time away from us when a friend house and dog sat for us.

It was like she was staying with the cool Aunt that let's you get away with everything! I'm so lucky to have friends who are dog lovers and want to treat her so well. Showered in cuddles and belly rubs just the way she likes it!

Doesn't look like Lexi minds being dog sat one little bit!

It has been a pretty big adjustment having a dog to look after and be responsible for.

Going out on the weekends we try to take Lexi with us wherever possible so she's not home alone all the time. And when we do go out as soon as we get home I open the back door and let her inside and give her lots of pats and attention.

Sometimes I feel guilty for going out and leaving her when she looks at me with those puppy dog eyes through the fly screen door ....

Where are you going?
Can't I come?
Don't leave me!


Our special little Lexi we will never hurt or mistreat you ... you're safe now xxx

 photo F0F68C01A59FABD46732FC15E1D8816D_zpsc6047f2f.png

For exclusive extras and daily updates ... follow Jarrah Jungle on Facebook, Instagram and Twitter


[All images my own]


Pin It Now!

Wednesday, July 17, 2013

The Making Of My Art And Clock Wall

Since my clock and wall art inspiration post I've slowly been sourcing frames and art for the small wall between the Living Room and Kitchen/Dining Room. I want it to be playful and interesting so I've used a mixture of coloured frames and art in different shapes and sizes,  DIYed some quote prints and narrowed down my selection of clocks so the ticking doesn't drive anyone crazy!

This is what I have come up with so far ....
 
This modern silver clock Mr P and I bought from Target when we first moved in together as a new time in our life ... owwww corny I know!


This funky yellow clock I got from Sportsgirl on sale for only $10.
 
 
I made my favourite line from Dirty Dancing Nobody puts baby in a corner print by typing it in a cool font and printing it onto some plain white paper. It will go into a box yellow frame with a striped backing which was also from Sportsgirl on sale for $5.

 
I printed this Be Yourself picture out on my colour printer from my Pinterest and found the teal frame for $5 at The Reject Shop.


This postcard of girls having a food fight was a freebie from a theatre event and I love the cheekiness of it ... literally their buttocks are on show! The gold and white ombre frame was on sale for $7 from Typo.

 
The 2 silver frames were a Birthday gift from a friend and I framed one of the inspiration quotes Laughter is wine for the soul from the kikki.K set that didn't make it onto the banner in the laundry. I think it's a pretty fitting quote for the kitchen.


The other silver frame I will use as an empty frame around the ceramic head hook I got from Typo for $15. It was a tough decision between the black rhino and white deer head so I put the vote to Mr P who liked the rhino better ... I'm branching out into the animal kingdom!


The other animal in the collection is the stag head wall art by Lucius Art which has been hanging up in the laundry but think it needs to be a part of this mix with it's greens and wooden frame.

 
From the posters book I picked the Moby print because the colours blend with the yellows and teals and the tea cup goes with the kitchen theme. I'm still trying to find the right frame for this one I'm not sure if I should go for a wood or black frame .... what do you think?
 
 
I have laid everything out on the bed in the Guest Bedroom so I can play around with the layout until I'm happy with it ... truth is I keep changing my mind and moving things around so we'll see what makes the final cut for the wall.

My plan is to have it all ready to go so that as soon as the paint is dry on the walls I can get these babies hung up so I can admire how it's all come together.

What do you think of my art wall so far?
 
 
Pin It Now!

Tuesday, July 16, 2013

A Kitchen Update ... Why Are We Waiting?!

Firstly, let me say I'm sorry for my lack of posting lately I know I've been a bit quiet on the blog over the last few weeks. It's because I've been struck down with the flu and with the winter blues here and the chilly temperatures it's taken me a while to feel better and think clearly enough to write. Thankfully I'm feeling heaps better now, my head is clearing and the motivation is creeping back ... so hows about an update on the kitchen then hey!

The kitchen renovation started 11 weeks ago and we are officially cooking and prepping in the new kitchen which is so much better than the cold concrete garage. But to be honest I'm still not motivated to cook elaborate meals in the new kitchen because I haven't actually unpacked anything yet so I'm running back into the laundry for kitchenware and the garage for the microwave, pantry and fridge items.

The new oven - still so new I haven't removed the protective film!

I'm absolutely dying to unpack everything. Some of my kitchenware has been packed up since we first moved into the house almost 4 years ago. You now believe me when I say I'm dying to unpack don't you?! It's going to be like Christmas unpacking all those things that I've forgotten about or haven't used for so many years. Of course there will also be things I wonder why I still have and they'll be passed onto friends or given away.

This is only half of my kitchenware packed up in storage in the Granny Flat
 
I haven't unpacked because I've been impatiently waiting for the kitchen company to come back to fix a drawer they drilled wrong and install handles because they didn't order enough and fix a panel that was cut trying to get the bench top in. They came last weekend and the drawer and panel were the wrong colour - the handles went in so I guess 1 out of 3 ain't bad hey! So there's now another week or so wait for them to be remade which means I still can't unpack and move everything in because they'll make dust and a mess all over my clean dishes and drawers.

The corner panel - made in the wrong shade of white
 
The drawer panel that needs to be replaced

Because they drilled a hole for the handle in the wrong spot!

The drawer panel was made in beige instead of polar white -
so now I'm waiting for another to be made !

Can I just say when it comes to hold ups and things not always going to plan, theres no point in getting angry and frustrated with tradies and throwing a tantrum (ok so I do vent to Mr P of course but not to them!) we are all human and allowed to make mistakes and so long as they work around us which they have been doing by coming on weekends and doing extra favours when asked like removing the cabinet sides, then we just have to wait and know that things will get done in the end.

Meanwhile, Mr P is going to get started on the plastering and prep work on the walls. Once the walls are ready we can get the paint brushes out and start painting the walls, door and window frames.

The only other thing to do is install the range hood we bought and pick out a splash back which shock horror we have finally made a decision on so I'll share that with you soon.
 
For updates on the kitchen as I go Like Jarrah Jungle on Facebook and you'll never miss a thing!
 
[All images my own]
 
Pin It Now!