As I drooled about recently I absolutely love stripes and decided I needed to stop buying striped items of clothing and instead get out the paint brushes and created a bit of stripes in the home.
I really wanted to make a statement on the entrance wall a sign that said 'Welcome to the Jarrah Jungle' a home of personality and fun but instead it looked like this
BEFORE
When we moved in it was a purple suede wall
DURING
Then we painted it a light grey Mountain Peak
AFTER
And then I got my stripe on woot woot
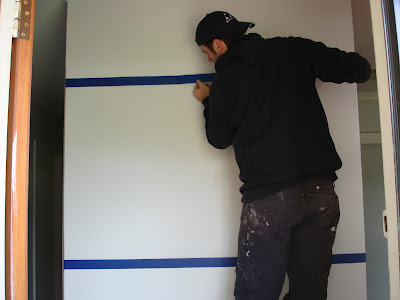
So I fluttered my eyelashes at Mr P and he measured and taped up the lines for me. Here's a tip, don't measure from the top of the wall and presume the wall is straight enough for you to draw a straight line. In any old house the walls are going to be slightly off so while you can measure and make marks from the top, always use a spirit level to draw the actual line to ensure it will be straight.
Now tape under the line so the paint will cover your pencil lines. Don't skimp on the quality of the tape you buy make sure you use a good quality painters tape and really press the tape down to stop any paint bleeding through.
Now it was my turn to do some work! I used the leftover paint from the media wall and did one big wide stripe. If felt so good to finally get my stripe on!
I was going to leave it at that but once I'd done one stripe I wanted to do another one. My excuse was there was a chip out of the bottom of the wall so I decided to hide it with a stripe. I filled the chip with filler, sanded it smooth and then got Mr P to measure and rule me another stripe (thanks babe!)
I painted 3 coats on each stripe and waited about 2 hours in between coats. So I could keep using the same roller I wrapped it in cling film and put it in a plastic bag and put it in the fridge. I wiped the tray clean between coats but wrapping the roller definitely saves on time washing it out.
I peeled the tape off about 20 minutes after the final coat - you definitely don't want to wait for the paint to dry or you'll risk pulling the paint off with the tape. There's something exhilarating about peeling the tape off at the end it's like the final reveal and it's exciting and scary at the same time seeing your finished product and hoping like buggery it looks good!
Ta da!
I want to say that I'm proud of myself for doing this stripe project because even though Mr P did the hard work of measuring it up, I got the paint out and painted, laid the drop sheets and cleaned up, etc and usually I'm keeping busy with domestic things while Mr P does the renovation work so I'm so happy that I got involved and did this.
All by myselfffffffffffffffffffffff (aka Bridget Jones style) well kind of!
All by myselfffffffffffffffffffffff (aka Bridget Jones style) well kind of!
Now it really is screaming for some artwork and that thick stripe is the perfect backdrop for some wall art, now I just need to find the right piece to hang up.
Sharing with Link Party Joy 2 Journey
[All images my own]
Pin It Now!
Sharing with Link Party Joy 2 Journey
[All images my own]


That looks great! I really like it!
ReplyDeleteAwesome!! Absolutely love it!! Another painting tip to make life easier: cover the roller tray with aluminium foil, so when you're finished, all you have to do is scrunch it up and throw it away, and the tray is left perfectly clean!
ReplyDeleteLooks brilliant! Well done you! Laughed about the getting things straight advice, the most common complaint when we do anything here is " why is nothing in this house straight?"
ReplyDeleteThat looks awesome! Love it!
ReplyDeleteOh my gosh ... you did a great job Bridget Jones style :) I love the two stripes and the fact that they were different widths! Thank you for sharing your talent with us at The "Sunday Stop"!
ReplyDeleteHugs,
Bj
Looks amazing! Such a simple concept but with a big WOW factor. Good on you for getting your stripe on.
ReplyDeleteThis is such a great idea and it sounds simple enough. You've achieved such a remarkable result! I just looked at your media wall - love it, I don't think I've seen too many feature walls behind the tv. It looks great.
ReplyDeleteHey, what an awesome idea! We are just about to move into a new house, and I'm wanting to perhaps to a feature wall in the bedroom to jazz it up a bit.
ReplyDeleteOur hallway upstairs is a bit dull, so something like this might be perfect! :) Thanks for the tips
Michelle, I love it!! The smaller stripe down the bottom was definitely needed and I love how well it joins the wall with the media room. Can't wait to see it all artworked up and well done you for doing it yourself! (I would totally call that doing it myself too :P)
ReplyDeleteYou are being featured on The "Sunday Stop" so stop by tomorrow and grab the featured button! I am also pinning it on Pinterest!
ReplyDeleteHugs,
Bj