Related Posts Plugin for WordPress, Blogger...

Wednesday, July 9, 2014

Tips For Picking Out Laundry Flat Pack Cabinets

Since my flat packs Vs cabinet maker post for our laundry renovation, we have done our research on the laundry flat pack cabinets and priced up and compared what was available at Ikea, Bunnings and Masters
 
In the end we decided to go with Masters because they have a 10 year warranty, the finishes were modern and looked like they were well made and best of all we had a discount voucher which saved us $350 off the total amount. 

Laundry flat pack layouts in store
 
First we checked out Masters online to get an idea of what they had on offer. Then we went to the store and created a shopping list by choosing what we liked on the displays - the colour and style of the door fronts, colour of the kick board, door handles and the size of the cabinets that fit.

We resisted the urge to buy everything there and then and went home and mulled over the design and all our options, priced it all up, triple checked it would fit, then went back and purchased everything.

I know that may sound tedious but they don't call me the Organising Queen for nothing! It all went smoothly because we knew what we were getting and we weren't standing in the aisles stressing out like shoppers around us where because they were overwhelmed with all the choices!
 
Planning and drawing with strong coffee and/or wine is a must!
 
Here are my tips on entering the world of DIY flat pack cabinets:
 
1. Go to the shops prepared - Take your room measurements, notepad, pen and a tape measure. You may look a little nerdy (or like an Organised Queen - or King!) but at least you'll be able to work out there and then what will fit and what won't.

I find taking photos is a good way to remember what it looked like and also a photo of the price tag which should have the model and measurements too. It saves having to write it all down which might make you look like a bigger nerd!

An organised mess!
 
2. What size cabinets - Most of the sizes are fairly standard so we worked out which cabinets would fit the space so that we could then have a play around with the layout. 
 
Ask yourself - do you want to fit in more smaller cupboards or fewer large cupboards. Do you want cupboards, drawers, or other features like drying racks. For us this depended on:
Cost - Is it cheaper to do it one way or another?
Aesthetics - What looks better?
Practical - What works for us?
 
Also check with the cabinets what's included as they vary by brands - hinges, shelves, how to hang, etc so there's no surprises about what you need to have the complete cabinets installed at home.
 
Playing around with layout and different sized cabinets
 
3. Special products or features - Keep your eyes open for special features that you can include in the cabinetry, as this may affect the type of cabinets or drawers you get.

Good storage and keeping everything organised is on top of my list for our laundry. So when I spotted this small pull out caddy that fits into a base cabinet I was sold straight away - it's perfect for holding all the cleaning bottles. I'm in love with my pull out caddy under the sink in the kitchen it's one of my favourite features of our kitchen renovation, they are such a great invention!
 
Our pull out caddy that will go into a drawer cabinet
 
4. Side panels and Kick board - Don't forget you need side panels between each of the cabinets as well and these come in various sizes.
 
You also need a kick board for the base cabinets, which come in just a few colours and if you are brave you can get a contrasting colour (like we did in our kitchen renovation). We were tempted to go with silver but in the end decided on white as it's just a small area and we didn't think it would add much to the design.
 
Our flat packs hand picked off the shelves
 
5. Pick the style and colour of door fronts - The basic flat pack range of doors has a mat finish which can be hard to clean and looks a little plain.

We went for a gloss finish Profile - Whitehaven which is heaps easier to clean and looks stylish and modern. These are slightly higher in price but I think will make our flat packs look more like custom made cabinets.
 
Our door fronts - a glossy bright white
 
6. Pick out the handles - There are so  many different styles of handles to choose from .... so many they all start to look the same after a while!
 
Consider the sizes, the finish (shiny or mat) and how they feel in your hand.  You want them to look good and be comfortable too.
 
Handles galore


7. Stop and think about it! - There's no need to pile everything on the trolley and rush home with it all there and then unless you're on a renovating show on TV!

Because let's face it, that's how mistakes are made and sometimes costly if you can't return items. Once you're confident in the design and decisions made then you can take your goodies home ...... and start assembling!
 
Trolley loaded - lets go!
 
I'm really happy with what we picked out, it feels good to be organised and have everything ready to go and the money we're saving by doing it ourselves is keeping us under budget.
 
We will be assembling and installing all the cabinets in the next few days so that the rest of the plumbing can be done and the tiler can finish laying the splash back tile.

Wish me luck on entering the land of flat pack assembling!
 
 
You can see all my Laundry/Powder Room renovation progress posts here:
Laundry/Powder Room Renovation - Changing The Plumbing

Linking up with:


 photo F0F68C01A59FABD46732FC15E1D8816D_zpsc6047f2f.png

For exclusive extras and daily updates ... follow Jarrah Jungle on Facebook and Instagram


[All images my own]

Pin It Now!

Tuesday, July 8, 2014

Beating The Travel Bug .... At Home

I have been feeling the travel bug nibble at me these last few months .....

I always need to have a holiday planned each year, it gets me through the working week and the home renovations and it keeps me sane to have something to look forward too and keep saving my pennies for.


Travel is my reward for getting out of bed for work instead of turning off the snooze and hiding under the covers all day.

When we are renovating at home on the weekend instead of tasting wines at a vineyard like I'd love to be doing ...... I just think of a holiday that we have planned and it makes it a lot more bearable!


Except that this year, we don't have any holidays planned .... well not yet anyway!

After our cruise ship holiday to New Zealand last year with my family, we decided this year we would holiday at home to save some money and to build up our annual leave time off work.

The main reason is we have a big overseas trip planned next year to the USA for a friends Birthday in Las Vegas! I am so damn excited about going to America - New York and Los Angeles are right at the top of my travel list for my must see places!


But until the big USA trip, this year I still need some travel adventures to look forward to, but on a smaller scale that doesn't take too much time off work or cost too much money.

So once the laundry renovation is finished we are putting the paint brushes down and having a breather before starting the next project - the courtyard!

We plan to sneak off for another weekend rendezvous and stay at a nice hotel close to home where we can drink a bottle of wine in fluffy bath robes in a fancy hotel room and I can have a bubble bath .... oh how I miss having a bath at home!


For a bit of a longer break, if the budget and time off work allows, we would like to take off for a few nights and take our furbaby Lexi with us for our first family holiday!

So I'm on the look out for somewhere that's dog friendly and fun for couples in Western Australia - maybe a coastal town so we can go fishing, have some beach adventures, for a chilled out relaxing holiday.


The only holiday thing I've officially booked is in September - I'm heading up north for a long weekend with some of my Book Club girls for the Kalgoorlie Cup. I'm really excited about this country road trip and will write more about this on the blog soon!

Our last road trip together was down south about 2 years ago and so much as changed since then in our little Book Club ..... we've had 2 engagements, 2 weddings and 2 babies!


So that's how I'm coping with the travel bug this year ..... a weekend away with Mr P, a few days off to explore our beautiful WA with our family of 3, and a road trip with girlfriends.

You can read more about my travels on my Travel Tips + Musings page here

For some great deals on travel Australia wide check out Travel Factory here

Do you have any travel plans this year?


 photo F0F68C01A59FABD46732FC15E1D8816D_zpsc6047f2f.png

For exclusive extras and daily updates ... follow Jarrah Jungle on Facebook and Instagram


[Images via my Pinterest 1, 2, 3, 4, 5, 6]

Pin It Now!

Monday, July 7, 2014

Book Club Book Review: Defending Jacob by William Landay

The book choice for the month of June at Book Club was Defending Jacob by William Landay


This story is told by the Dad, Andy Barber who for 20 years has been the Assistant District Attorney in the county of Massachusetts. The tables are turned when it's his own family who are accused of a crime and taken through the court process with everyone in the town including their friends and colleagues, presuming they are guilty of their son's crime.
 
The accused is Andy's 14 year old son Jacob, who is put on trial for killing a fellow student. The story is a court room drama about the trial and how it affects the Barber family.
 
The story teller Andy and his perception of the world compared to his belief in his family just didn't add up. For a smart, knowledgeable policeman he seemed pretty naive when it came to his family.

I liked the writing style of the book, and it was a great suspense style read - you won't know whether Jacob is guilty or innocent right until the end. But it is a sombre read, with a dry humour and I just felt it was too long at 400+ pages to stay on the one topic and family.
 
I would recommend this book to readers who like court room dramas with a bit of suspense thrown in.
 
I give this book 2 stars out of 5

Jarrah Jungle's Star Rating:
1 Bad - I'd rather eat brussel sprouts topped with anchovies than read this again
2 Not Good - I'd rather watch re-runs of Neighbours than read this again
3 Ok - I'm sitting on the fence - its not great but not terrible either
4 Good - I'd pass up a pack of tim tams for this read
5 Great - I'd pass up a date with Johnny Depp for this read


 photo F0F68C01A59FABD46732FC15E1D8816D_zpsc6047f2f.png

For exclusive extras and daily updates ... follow Jarrah Jungle on Facebook and Instagram


[Image via Dymocks]

Pin It Now!

Friday, July 4, 2014

Let's Go Shopping .... Mosaic Tile Splash Back

Last week I had a change of heart about the splash back we had picked out for the laundry and powder room renovation.
 
I was going to be thrifty and reuse the leftover mosaic and white tiles from our bathroom renovation but after much deliberation, magazine reading, Pinterest trawling, internet browsing, and finally a day of shopping I have found the perfect splash back mosaic tile with the wow factor I was looking for and I'm much happier with my decision now and more than ready for the tiler to lay the tiles next week!
 
http://jarrahjungle.blogspot.com.au/p/bathroom.html
The white tiles and mosaics from our bathroom renovation we were going to use
 
The main reason I changed my mind is that I don't have enough of the silver mosaics to do a large feature stripe on the laundry splash back between the white tiles - I really like how we used a wide stripe of the mosaics in the bathroom and want to create the same sized feature.
 
There would only be enough for a thin mosaic feature stripe
 
I played around with different layouts of the leftover tiles we have, even using the wood panel wallpaper I bought, but just didn't think that any of these will work. Check out my photo editing anyways using our actual tiles and new vanity and sink.
 
Playing around with my tiles and wallpaper
 
So I took myself on a mosaic tile shopping mission !
 
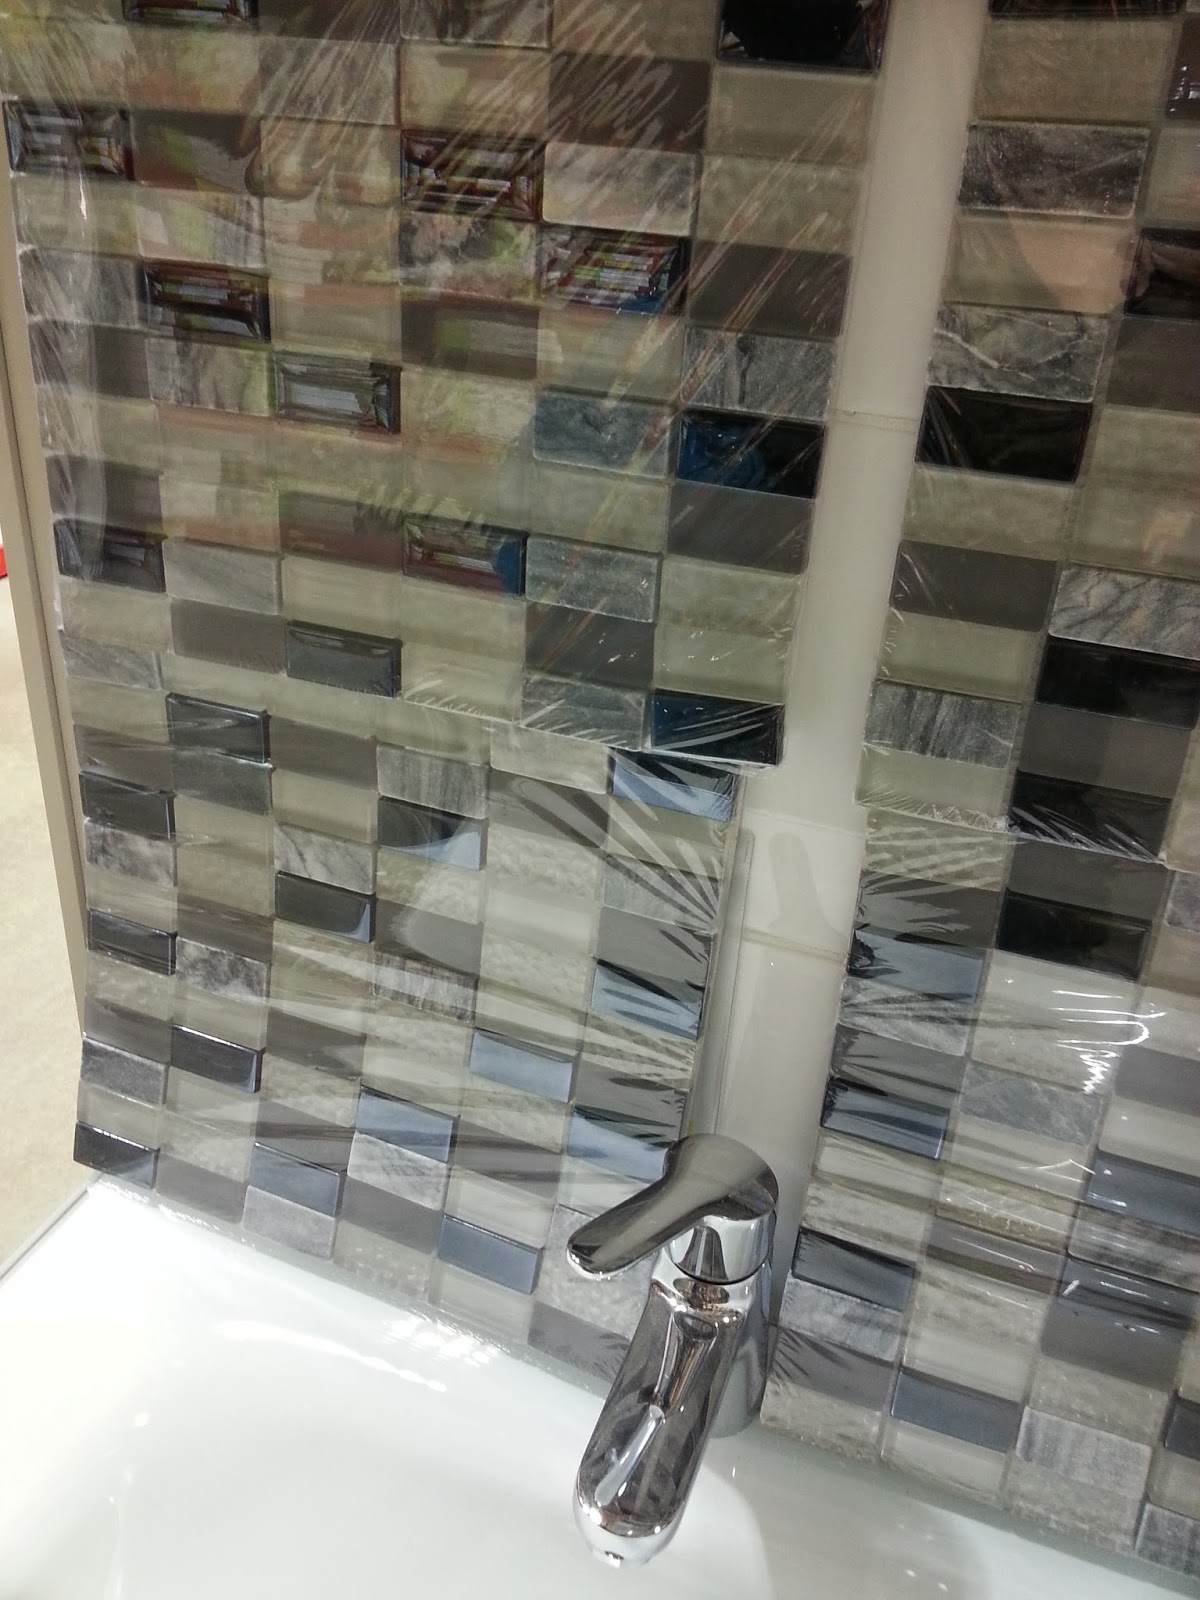
Decor8 mosaic tile at Bunnings for $16.50 a sheet - This was the first shop I went to mainly because it was open late at night when I could shop after work! I really love these rectangle mosaics, the different shades of grey, and the mix of materials used glass, stone and tile.

But Mr P wasn't too impressed with the tile sample I bought home and wanted something with more colour ...... so the tile hunting continued! 


Johnson Aqualite tile at Bunnings for $11.75 - I like the punch of blue and grey tones on this glass tile. But there wasn't enough of these tiles in stock and all the ones they had were scuffed and scratched because there was no protective film on them. Also because of the size I'd need to do a double row to get the thickness I want which would cost twice the price. If I used these around the vanity, I'd need to use some of the white tiles as well as these because I couldn't do the whole feature in just these tiles it would cost a fortune.


Gem mosaics from Masters at $20 a sheet - I like the colours of the blue/green tones but the tiles were made from really thin glass and a lot of the samples were chipped which wasn't a great sign. Also they didn't have the net on the back of the sheets to hold the tiles in place, they are stuck to plastic and you put the tile on the wall and then peel off the plastic front. It seemed like it would be a bit fiddly to install and the risk that the mosaics would be crooked once the plastic was removed meant this tile lost it's appeal to me.
 
That same day I found an identical tile at a fancy tile shop Ceramo in Osborne Park and they were $220 each for what looked like the exact same tile ..... Although there was clearly a $200 difference, I just couldn't see what it was!


These oval mosaics from The Tile Clearance Centre in Osborne Park (the warehouse of Osborne Park Ceramic Tile Centre) at $15 a sheet - I fell in lust with the shape, style and changing colour of this tile. It had a rusty water mark pattern which changed colours in the light and they had them in blue and black. But they didn't have enough in either colour to do the job and there would be no allowances if the tiler made a mistake. I also thought the round shape of the tile might clash with the square basin and vanity and tap mixer.
 
Eventually I talked myself out of these ones after debating with myself for a few hours and calling Mr P a dozen times to see what he thought .... Oh and get this Mr I Want More Colour said "I hate to say it but these might be too colourful!"  you've got to be kidding me!!


I liked these tiles from Craft Decor but they were $30-$40 a sheet - Which was more than double the other tiles I found. They were nice but not that nice to triumph my other choices!

I find it really handy to use colour chips so you can see how the mosaic will look with the cabinets, bench top and other tiles and most tile shops have samples in store you can use.


So in the end Mr P changed his mind and said he quite liked the different tones of the silver mosaics from MY VERY FIRST shopping expedition.

This could have saved me a day of shopping Mr P but I guess all future design questions should only be asked whilst offering a beer and not after 10pm at night when we'd both been working all day and then come home to plaster up the walls ready for the tiler! Oh the joys of being a working renovating couple :-)


The price is fantastic at just $16.50 a sheet we can afford to do all mosaic around the powder room sink instead of just a stripe of mosaic. Plus my large feature stripe on the laundry splash back.

We also don't need to stress if the tiler cuts it the wrong way and needs spares, we can go and get another sheet as there's plenty in stock and Bunnings is open until 9pm every night if we need to do a last minute dash for supplies!
 
The tiling commenced this week but because of our cold winter weather the concrete and water proofing has taken double the time to dry, which means the floor tiles that were meant to be laid today are being laid on Monday.
 
We are making progress which I'll share with you on the blog next week! For tiling and renovation action as it happens follow me on Facebook and Instagram.
 
  
You can see all my Laundry/Powder Room renovation progress posts here:
 
 
Linking up with:
 

 photo F0F68C01A59FABD46732FC15E1D8816D_zpsc6047f2f.png

For exclusive extras and daily updates ... follow Jarrah Jungle on Facebook and Instagram


[All images my own]


Pin It Now!

Thursday, July 3, 2014

Recipe: Chicken Mulligatawny Soup

I had never even heard of this Indian Chicken Mulligatawny Soup before but after trying it for lunch at my local soup bar I just had to try to recreate the dish at home ... It had chicken, lentils, vegetables and crunchy apple in a spicy coconut milk broth with toppings like fresh coriander and sprouts and served with a side of rice. It was like a meal in itself so fragrant and tasty.

So in between painting the front of the house the other weekend I made a pot of this delicious Chicken Mulligatawny Soup .... it was easy to make and the smell of the lovely fragrant spices kept us painting until late afternoon because we knew we could relax and enjoy a bowl of deliciousness after all our hard work!

 
Chicken Mulligatawny Soup

Ingredients
1 tbs vegetable oil
4 chicken thighs
2 red chillies, finely chopped
2 tbs garlic and ginger paste
1 brown onion, finely chopped
2 tsp ground turmeric
1 tsp ground cumin
1 tsp ground coriander
1/4 cup yellow split peas, rinsed
1 carrot, finely diced
1 granny smith apple, finely sliced (I grated mine, but sliced is better so you get more of a crunch!)
5 cups chicken stock
1 can coconut milk
Juice from 1/2 a lemon
Salt and Pepper
 
Toppings
Sprouts
Fresh coriander, chopped
Roasted peanuts, coarsely chopped

Method
1. Heat oil in a large saucepan. Season chicken with salt and pepper, add to pan and brown on all sides. Remove from pan.
 
2. Turn down the heat and add the onion, chili, garlic and ginger to the pan. Cook until soft, stirring occasionally.
 
3. Stir in the spices, split peas and carrot and return the chicken to the pan. Add the stock and season with salt.
 
4. Bring to the boil, cover and simmer for 45 minutes until the split peas are tender and chicken is cooked. Give the soup a stir to make sure split peas aren't sticking.
 
5. Remove chicken and transfer to a board and shred the meat with a fork.

6. Return the chicken to the soup, add the coconut milk and bring to the boil.
 
7. Season to taste with lemon juice and salt and add the apple.


8. Ladle soup into a bowl and top with coriander, sprouts and peanuts.
 
9. Serve with a side bowl of steamed rice.

This soup is packed with tasty chicken and vegetables and all the Indian spices to make it one of my latest favourite soups ..... and you all know how much I love my soups!


 photo F0F68C01A59FABD46732FC15E1D8816D_zpsc6047f2f.png

For exclusive extras and daily updates ... follow Jarrah Jungle on Facebook and Instagram


[All images my own]

Pin It Now!

Tuesday, July 1, 2014

Laundry/Powder Room - Changing The Plumbing

We are not one to do things half hearted here in the Jarrah Jungle house so when we decided to renovate and gut the laundry and toilet that meant changing all the old plumbing as well.

We had our plumber here from 6am until 10pm on Saturday and Mr P and the plumber spent the whole day digging trenches for pipes, cutting through the brick walls and coring holes in the retaining for new plumbing, removing the old terracotta pipes and fitting all new PVC pipes, and working their butts off for 13 hours until it was all done.

The plumber is a good friend of ours and I always look after our tradies .... I kept him replenished with my famous sandwich queen toasties for lunch and sent him home with a bowl of Slow Cooked Italian Beef Casserole for dinner!


After sculling a few espressos bright and early Saturday morning, we were ready to start! Firstly, we worked out where all the cabinetry, sink, and taps would go and drew the plan on the walls so they knew exactly where to cut and fit the new plumbing. 
 
It was really good to be organised and have all our materials ready because we could work out the height of the upperhead cabinets and placement of the sink etc so that it's all exactly where we want it. That's one of the best things about renovating you can personlise whatever you want - bench heights, cabinet heights, great for a shortie like me! 
 
Our plumber drawing on our walls .... again!
 
Working out where the laundry trough and taps will go
 
We are adding a vanity and basin to the toilet to convert it into a powder room - that needed new plumbing and pipes. The pipe lines were cut into the brick walls with a wet saw, then the copper pipes laid in and finally they were cemented over and then we'll plaster over ready for tiling and painting.
 
New plumbing being cut into the walls
 
New pipes laid for the sink going into the toilet
 
The plumbing for the new toilet was done as well, although the instructions weren't with the toilet there was a note stating we had to look up their website to find the specifications to install .... don't you just love technology nowadays! This toilet is going to be so much better and give us more space too, can't wait!
 
New toilet plumbing installed
 
Then cemented over .... we will also plaster and sand smooth before painting
 
We are also changing the laundry trough plumbing and we are putting in a mixer tap instead of the dual taps that come off the walls. We also put in taps for the washing machine, which will be a new front loader washing machine (still to buy!) 

New plumbing for washing machine
 

Coring a hole in the retaining for the pipes
 
We removed all the old services off the wall in the laundry so that we can put cabinets on the walls. It's going to be fantastic having extra storage in here and a great use of the otherwise unused wall space.
 
Old water services on the wall
All disconnected and moved 
We also moved all the water services off the wall out the back, just outside the laundry here. We also had to disconnect the hot water system, lower it about 50cm and put new fittings on it to put it into it's new spot. Our hot water comes on so much quicker now and is hotter too!
 
The reason we had to lower the hot water system is because we're going to build a deck out the back here and it was sitting too high. We also removed all the pipes so that we can render the back of the house just like we rendered the front.
 
Before the water services were removed and hot water system lowered
 
Progress - Most of the pipes removed (just 1 more to go!)
 
Once all the plumbing was done and our awesome plumber went home and  Mr P and I were in need of some comfort food and wine after that 13 hour day!
 
On Sunday we did a few more improvements in the room - the jarrah floor boards leading off the kitchen in the laundry always use to bend forward and creak ..... that's because there was only 1 support holding the floor boards up. So we put a few more supports in there so that it is supported properly and ready for the concrete floor in the laundry to be laid.
 
Supporting the floorboards
 
No more sqeaks and creaks!
 
Now that all the plumbing and pipes were done, we carried back in all the tile and rubble from last weekends demo to level out the floor ready for it to be tiled.
 
Ready to be carried in .... one bucket at a time!
 
Levelling out the floor
 
Our site supervisor Lexi always keeping an eye on things!
 
So besides a bit more cementing, plastering and sanding over the new pipe lines on the walls to prep it ready for painting, all the plumbing is done (for now!) and we are ready for the tiler who is booked in for 4 days work this week to screed, water proof and then tile the floor, kick tile and splash back in the laundry and toilet.
 
I'm having splash back freak out at the moment, doubting my first design plan so let's hope I can make a decision and find a perfect splash back in the next few days in time for the tiler to tile the laundry and powder room!
 
Wish me luck!!
 
You can see my Laundry/Powder Room renovation progress posts here:


 photo F0F68C01A59FABD46732FC15E1D8816D_zpsc6047f2f.png

For exclusive extras and daily updates ... follow Jarrah Jungle on Facebook and Instagram


[All images my own]

Pin It Now!