Related Posts Plugin for WordPress, Blogger...

Wednesday, July 13, 2016

A Step By Step On How To Make A Rain Chain

Something that isn't often used in Australian homes but is a great idea is a Rain Chain. 

It's an alternative to a down pipe and is basically a chain that hangs down the gutter to direct rain so that the gutters don't fill up and overflow with rain water.


We installed all new gutters, facias and down pipes when we did our roof restoration but the problem we have at the front of the house is because of the large windows there isn't room for a down pipe - so instead we had to drill a hole in our lovely new gutter to let the rain come out.

But then when it rained water poured from the hole down to the ground meters below and it was so loud .... It sounded like a herd of elephants going to the toilet in front of my bedroom window - not quite the ambiance I want to hear from my bedroom sanctuary! 

So to ease the water down the hole in a more delicate fashion we made a Rain Chain so the water follows the chains down like a waterfall into a feature pot which is connected to our drains. It's not only quiet as a mouse but practical too and it's made a really nice feature in the garden.

I'll take you through the steps of how we made a Rain Chain ......


Prepping The Chain

For the chain I wanted to use a shiny metal chain but it was going to be too heavy and put too much weight on the gutters possibly causing them to bend or damage them. 

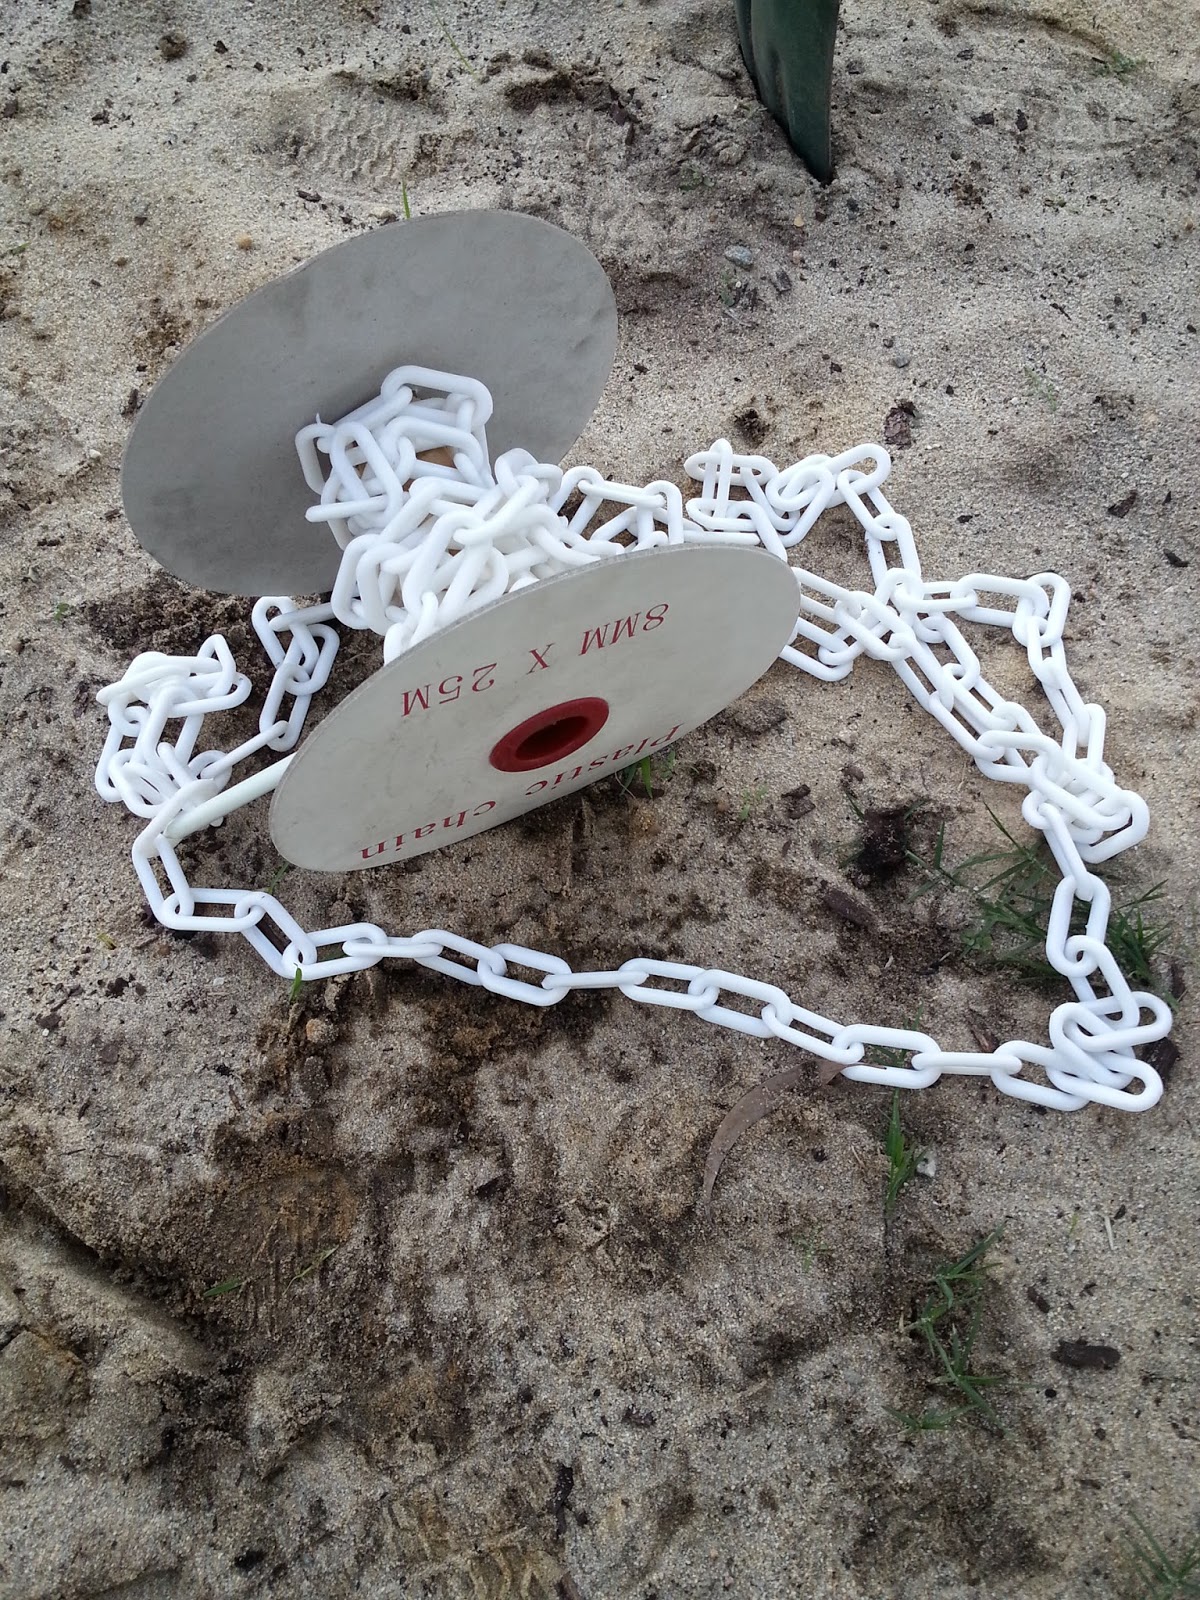
So instead we used plastic chain which was nice and light but it looked a bit cheap and nasty so this was fixed with some spray paint - first I painted the chain with some Dulux plastic primer spray paint I had leftover (it is so important to use primer to help the paint stick, especially when it's something for outside as it needs to hold up to the elements). Then I added a few top coats of colour in a galvanised spray paint in bright silver.


Making Adjustments + Adding Extra Chains

Fast forward a year of using the Rain Chain and we found the chain sitting in the hole on it's own didn't work very well in heavy rain as the rain couldn't follow the chain properly. So we decided we needed to add a few extra chains.

We also fitted a 50mm round pop to go in the gutter and then attached a 50mm pvc socket to it and glued it using silicone - this way the chain sits inside the socket and it's much better at keeping it in place. I spray painted the PVC socket with the plastic primer and then in Colorbond Ironstone (which is the colour of our gutter) so it blends in with the gutter. The round pop was metal and you can't see it as it sits inside the gutter so that didn't need painting.


We also decided to hang some extra chains and got some more plastic chain and as above, I spray painted it with a plastic primer followed by a galvanised spray paint in bright silver.

You can see how the orange plastic chain looks before paint and next to it after being painted with silver - it looks like metal right!


Hanging The Chains

We hung one length of chain to a dowel inside the hole in the pop in the gutter.

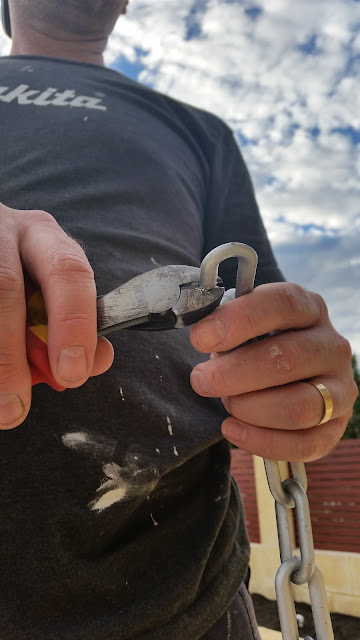
Then used pliers to open a link on the other chains and clip them to the center chain.

To hold all the chains together we secured them with a plastic zip tie at the bottom and then covered the ends with stones in the bottom of the pot so that it will stay in place.


Drainage for the Rain Chain

You can just let the Rain Chain overflow and the water drain off where ever it's positioned but because it's so close to the house foundations we don't want the water to run back towards the house so we went that one step further and connected drainage to the Rain Chain for it to drain directly into the soak wells. 

It was easy enough for us to do this because we were putting in the soak wells and drains anyway in our new courtyard so it was just another pipe to run from the Rain Chain and connect it to the drains going into the soak well. 


To be extra cautious and to stop any water leaking around or under the house we also waterproofed the limestone retaining walls of the house to protect it. We painted on 2 coats of waterproof paint (the same one we used to seal the courtyard garden beds) and left it to dry for a few days before filling it in with sand.

We also removed the old garden tap that was there and covered the hole in with cement. The plumber disconnected the pipe but hadn't removed the tap fitting so this was easy enough for us to do.


Feature Pot for the Rain Chain

Once the pipes and plumbing were done we were ready to secure the Rain Chain to a large feature pot so the chain doesn't move around in the wind and rain and it will be the feature of our Rain Chain garden.

I went on a shopping expedition for the perfect pot that had a wide opening to catch all the water sprays off the chain and also a solid flat base so that it would be stable on the ground and not topple over. Once we had the right pot, we drilled a hole in the bottom of the pot and fitted a plastic drain to attach to the pipe.


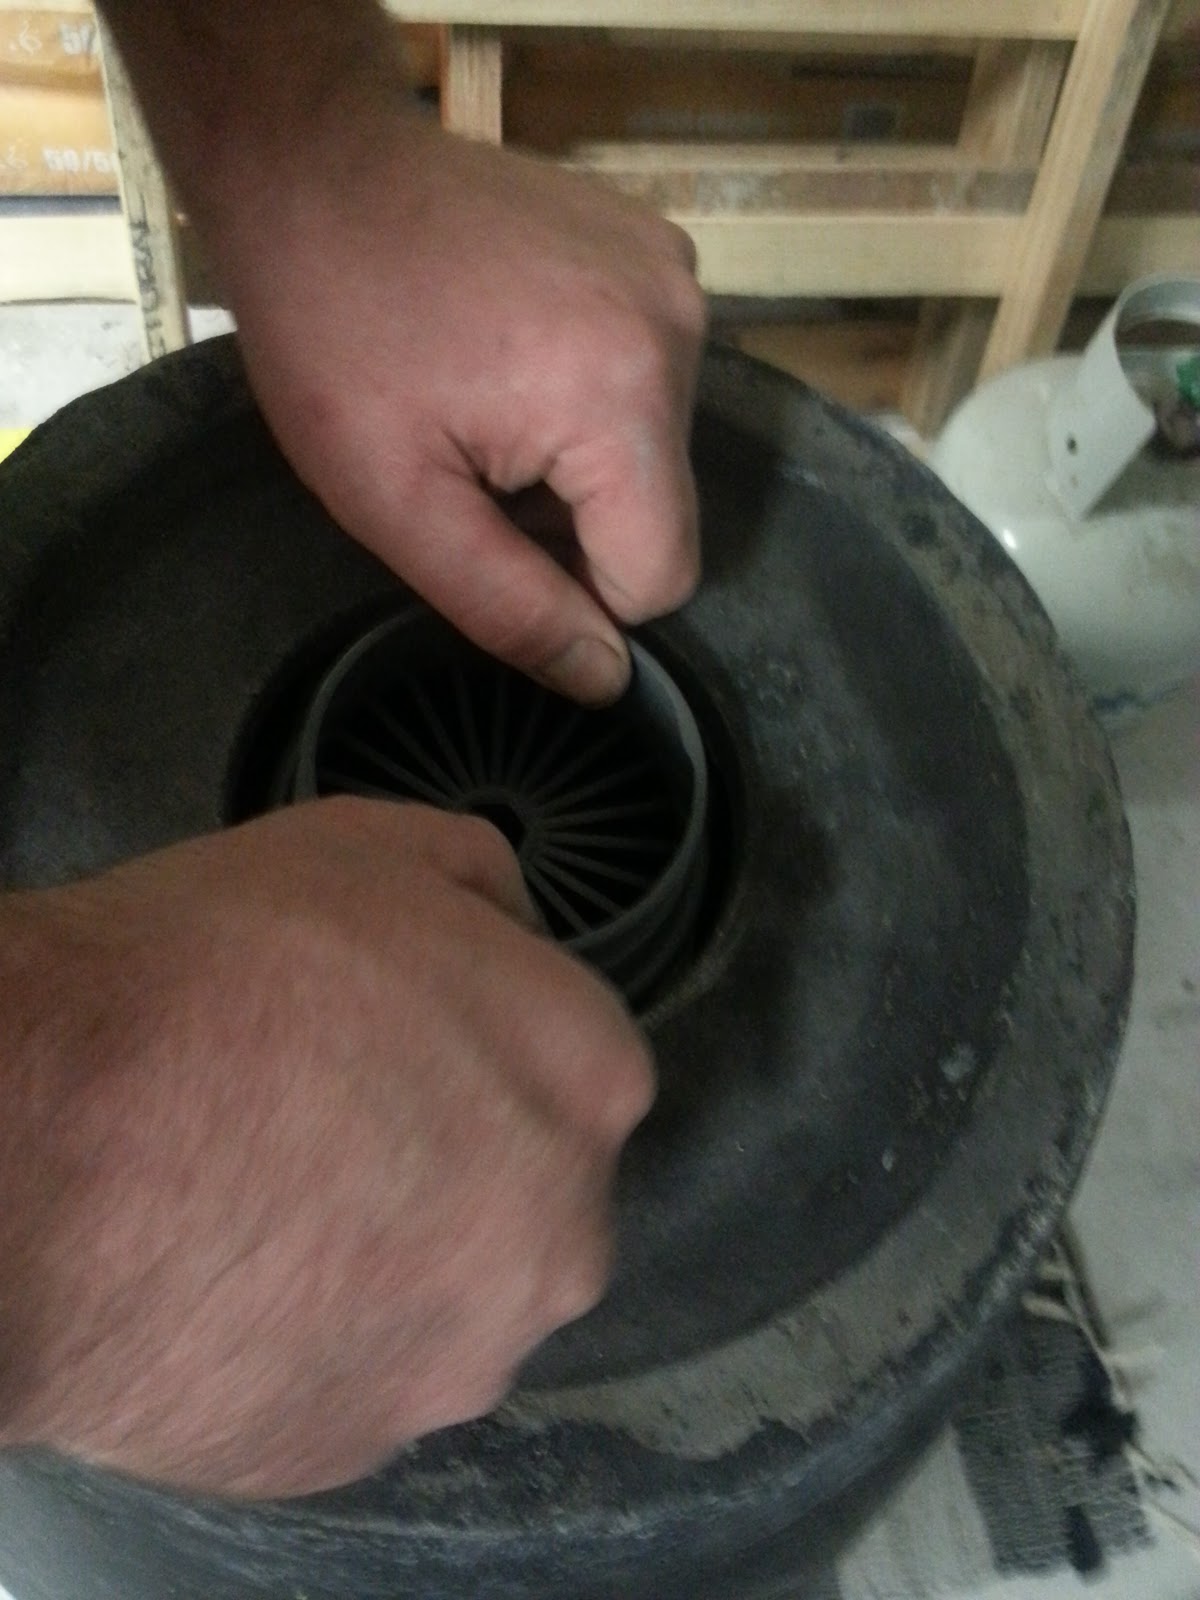


Now the pot had drainage it was ready for the Rain Chain garden.

We leveled the ground and laid some old pavers around the pipe for the pot to sit on to give it a solid firm base.

We cut the pipe so that it would sit inside the drain in the pot nice and neatly.


Once the pot was sitting perfectly flat and level on the pavers and over the pipe, we half filled the pot with stones.

We used stones as they'll allow the pot to drain when the water goes in whereas if we filled it with sand or soil it wouldn't drain.


Now the pot is secured in place and the extra chains are much better for the rain to follow the chains down into the pot and create a water feature while saving our gutters from overflowing!

Landscaping the Rain Chain garden bed is next on our courtyard project list - we're going to fill the bed with pebbles, pots and hardy plants like succulents or natives. I'll come back and add some after photos once it's looking all nice and pretty!

It cost about $150 to make the Rain Chain feature, below is the breakdown:

$15  plastic chain
$10  spray paint
$0    pavers (we already had)
$30  pop, PVC socket, dowel, drain and pipe
$70  feature pot
$25  gravel

So ..... what do you think of our Rain Chain feature? 


Sharing with link parties:
Curly Crafty Mom - The Creative Corner
The Dedicated House - Make It Pretty Monday
Savvy Southern Style - Wow Us Wednesdays
The Plumbette - Home Improvement Thursday


 photo F0F68C01A59FABD46732FC15E1D8816D_zpsc6047f2f.png

For exclusive extras and daily updates ... follow Jarrah Jungle on Facebook, Instagram and Twitter


[All images my own]


Pin It Now!

Monday, July 11, 2016

Book Review: Mercy Street By Tess Evans

This is a book review of Mercy Street by Tess Evans that was published by Harper Collins on 1 January 2016.

Tess Evans is an Australian author and this is her third novel. Tess's first novel was published the year she turned 60 which proves it's never too late to follow your dream! Tess is married with three grown children and lives in Melbourne, Australia.


Set in suburban Melbourne Australia, this is a beautiful story of George a 67 year old widower who has been living a lonely life since his wife of 50 years died three years ago.

Then along comes wild child and single Mum 19 year old Angie and her 5 year old daughter Rory and George's days are suddenly full with his instant family.

The story is realistic and honest and follows the lives of typical Australians. The characters are all portrayed brilliantly and provide plenty of drama, entertainment and warm and fuzzy moments.

There are many great messages and meanings within this story and I was really moved at the thought that a troubled child could make a cranky old man soften and feel love. The writing was funny and easy to read and the story didn't drag on either it was quite a short book which I finished in just a few days. I thought the ending was a bit harsh and rushed and that's the only reason why I didn't score it a perfect 5/5 stars.

I recommend this book to anyone young and old it will make you appreciate the simple things in life.


I give this book 4 stars out of  5

Jarrah Jungle's Star Rating:
1 Bad - I'd rather eat brussel sprouts topped with anchovies than read this again
2 Not Good - I'd rather watch paint dry than read this again
3 Ok - I'm sitting on the fence - its not great but not terrible either
4 Good - I'd give up a bottle of the worlds best champagne for this read
5 Great - I'd pass up a date with Johnny Depp for this read


Mercy Street can be purchased from the author here and Harper Collins


Sharing my book review on Good Reads here and Netgalley


Disclosure:  NetGalley partner with bloggers such as me to help promote authors and their books and I was given this ebook published by Harper Collins to review. As always, all opinions are my own.


 photo F0F68C01A59FABD46732FC15E1D8816D_zpsc6047f2f.png

For exclusive extras and daily updates ... follow Jarrah Jungle on Facebook, Instagram and Twitter


[Image via Harper Collins] 

Pin It Now!

Friday, July 8, 2016

1920's Murder Mystery Party Planning

My friends love a good themed party and I love to get involved and help with the party planning - so today I'm sharing my latest party planning venture an 1920's Murder Mystery Party thrown for a friends 50th Birthday.

The Murder Mystery game Murder at the Four Deuces we found online at Dinner and a Murder - we picked this one because it had great reviews, a forum with helpful advice from other users and it was cheaper than the box kits you buy as you download and print everything yourself (although they do sell the box kits as well).


I have played a few Murder Mystery games but always from a box kit and everyone has to solve the murder in teams.

This style of Murder Mystery was very different - everyone was assigned a character before the party so you know who you had to come dressed as and what you had to do and you worked individually.

I really loved this version of the game it was a lot more fun and interactive and got everyone involved and playing out a character.

The gangsters, gamblers, inspectors, flappers and more!


We also hired a host for the night to co-ordinate the event and it is well worth the cost to do this as it means all the guests can enjoy themselves and let the host keep everyone on track and host the game.

The invitations I made using the Avery design and print online and printed them on Avery invitations I had leftover from my wedding stationary. I kept the design simple in black and white and put them in black envelopes with matching address and return address labels (the labels are also an Avery design). 

Once everyone had RSVP'd they were assigned a character and sent their character booklet which explained who they were to come as, how they should dress and the part they will play.


We hired a stunning house for the party via Airbnb which had a real retro feel to it which fit with the 1920's theme perfectly. It's such a great idea to hire a house for the night it really made the party that bit more exciting being in a different environment.

The house owners let us come over the night before and set up all the party decorations which was fantastic because then the night of the party we just had to show up, light the candles and get the food and drinks ready.


The Murder Mystery setting was in Chicago in 1922 at "The Four Deuces - Speakeasy" which is a club that serves alcohol at a time of prohibition when alcohol was banned. 

You had to knock three times and say a password to enter the front door. The host welcomed everyone and handed out goodie bags with an extra copy of the character booklet, name tag and fake money.

At the front of the house we put out tealight candles in decorated jars leading up the steps to the front door and a blackboard which read A LITTLE PARTY NEVER KILLED NO-ONE. Inside as you entered the front door you were greeted with empty boxes, wine bottles, and signs I found on Pinterest and printed out plus some signs like the Four Deuces came with the Murder Mystery game. 


We stuck to a classic colour theme of - black, white and gold.

For a table centerpiece we spray painted empty wine bottles with a gold spray paint, filled them with feathers and wrapped pearls around the bottles.

The small jars with ribbons and lace were used to hold candles and these were scattered all around the rooms (I DIY these for my engagement party).


Empty boxes were in the living room with alcohol labels on them that I designed on the computer, printed out and stuck on the boxes. The boxes were also filled with empty wine bottles.

On the TV we had black and white silent movies playing and for music we had jazz playlists on an ipad that we played through speakers. The movies and music created a perfect ambiance and really set the scene.


In another living room we set up the photobooth flower backdrop (I DIY for my wedding), with an old wooden box filled with props, we had 2 polaroid cameras with film and a guest book which everyone wrote messages in and stuck the polaroids into.

The jail sign I designed on the computer, printed out and had laminated. The photobooth and guestbook signs I found on Pinterest and printed out and framed in gold frames.


Outside on the balcony overlooking the pool we set up a tressle table for the food and drinks. 

The food was 1920's themed using the names of some of the characters. The menu I designed on the computer, printed and framed in a gold frame. We served MeMe's devilled eggs, Prohibition pizza, Big Al's Frankfurts, Golden Age finger sandwiches, Big Daddy's sausage rolls, Gatsby stuffed mushrooms, Roaring twenties crudites with dips, Roasted nuts and olives. 

The drinks were in the bar fridge with glasses nearby. The bar signs I printed and framed were found on Pinterest.


The Birthday cake the Birthday girl arranged herself and it was a show stopper .... isn't it amazing! 

It also matched the black, white and gold colour theme perfectly!


The venue, decor, music and food all set the scene for this 1920's party and it was awesome!

I had so much fun helping with the decorations and party planning and we are already talking about the next Murder Mystery party .... all we need to do is settle on a theme!

Have you been to a Murder Mystery party?


 photo F0F68C01A59FABD46732FC15E1D8816D_zpsc6047f2f.png 

For exclusive extras and daily updates ... follow Jarrah Jungle on Facebook, Instagram and Twitter


[1st image from here, venue via Airbnb and all images my own]

Pin It Now!

Wednesday, July 6, 2016

New Limestone Retaining Wall + Colorbond Fence

I have another subdivision update on the blog today!

Once we agreed on a plan with our neighbour for a new retaining wall and fence we could go ahead and get the work done.

Bright and early Sunday morning the guys building the retaining walls (who also built our limestone courtyard) were ready to get to work and with the help of the bobcat driver digging up the old fence panels, Mr P removed the old fence panel by panel, wrapped it in plastic and took it to the rubbish tip.


Once the fence was removed they measured out where the new wall would be built on our side of the boundary.

The land was dug out with a bobcat so it was level and ready for the new limestone retaining wall to be built.


The retaining wall is built with these big meter long limestone blocks.

They are too heavy to lift by hand so the bobcat is used to carry them over and put them into place and they are then cemented in.


It took just a few hours to build the first course of the wall and then start on the second course. The wall is staggered as it follows the height of the land.

These guys work really fast I can't believe how quickly the wall was built.


The next day the guys finished off the second course of blocks on the retaining wall.

They also did the top section of the wall adjoining our garage. This section steps up again and will be the length of our new backyard once we have subdivided the block.


Next we booked in the fence guys to come and install the new colorbond fence in classic cream which will be installed in the center of the retaining wall in the backyard.

You can see the neighbours have already had the new fence installed along the rear of their boundary and the same style of fence will be used for the side. There are different patterns of metal you can get but we agreed to stick with the same style.


We also had the side section of our driveway fenced in. This retaining wall was built a few years ago by the guys who built the courtyard and they did this section at that time but it wasn't until now that we were ready for the new fence to go in.

The fence will follow our boundary line but instead of sitting it on top of the retaining wall it will go behind the retaining wall.

It's made the driveway and front of the house feel a lot more private and secure.


The new fence looks great and it makes our home look modern and newish ..... you'd never know it's a retro 1960's home now!

So now that one side of the property is fenced in we are very eager to come to an agreement with our other neighbour so we can get the other side done.

We also need to have a retaining wall and fence put in down the center of the block which will signify the new backyard space for the front house. We are going to build a deck in this space as well so we are currently looking for a draftsman and structural engineer to draw up plans for us and then submit it to our local Council for approval.

Slowly but surely our subdivision plans are almost complete which is a good feeling!


Sharing with link parties:
Curly Crafty Mom - The Creative Corner
Savvy Southern Style - Wow Us Wednesdays
The Plumbette - Home Improvement Thursday


 photo F0F68C01A59FABD46732FC15E1D8816D_zpsc6047f2f.png

For exclusive extras and daily updates ... follow Jarrah Jungle on Facebook, Instagram and Twitter


[All images my own]

Pin It Now!

Monday, July 4, 2016

Book Club Book Review: All The Light We Cannot See By Anthony Doerr

This is a book review of my Book Club's pick for the month of June - All The Light We Cannot See by Anthony Doerr


This is a story set around the 1940's during World War II and jumps between two main characters - a blind girl Marie-Laure in France and an orphan boy Werner in Germany. Told at a time when Germany went to war and invaded France with both the characters being deeply affected by it and how they lived their lives during and after the war.

Both Marie-Laure and Werner are strong characters with their stories told parallel to each other with very short chapters which quickened the pace and switched between the past and present day.

It took me a while to really get into the story but once I did I was hooked. The last third of the book really builds momentum until the very end and leaves you wanting more. The writing is beautiful both in the expressive words and quotes and the meaning behind the story.

I have read many wartime books but this story was different in that it was told through the eyes of children during the war, what it was like inside Hitler's Youth schools and how childhoods were affected forever.

I recommend this book to those who like wartime stories told from a different perspective through the eyes of youth.

I give this book 5 stars out of  5

Jarrah Jungle's Star Rating:
1 Bad - I'd rather eat brussel sprouts topped with anchovies than read this again
2 Not Good - I'd rather watch paint dry than read this again
3 Ok - I'm sitting on the fence - its not great but not terrible either
4 Good - I'd give up a bottle of the worlds best champagne for this read
5 Great - I'd pass up a date with Johnny Depp for this read


 photo F0F68C01A59FABD46732FC15E1D8816D_zpsc6047f2f.png

For exclusive extras and daily updates ... follow Jarrah Jungle on Facebook, Instagram and Twitter


[Image my own] 

Pin It Now!