Finding doors for the new doorway we created when we turned the dining room window into a doorway has been a bit of a challenge. But that's ok I'm not afraid of a challenge I like to think of it as an adventure!
We checked out the few companies in Perth that sell french doors and in the most popular store where they offer an $1889 package 2 french doors installed and ready for painting or staining we were not really impressed. They only had one style of doors to chose from and honestly the quality of the door didn't feel that great so I asked if there were any other doors to pick from that are a bit more solid I was told no everybody buys these ones and this is all we have .... Ok well I'm not everyone and I want a better door than that! Of course I'm too nice to actually say that out loud but I left deflated all the same.
 |
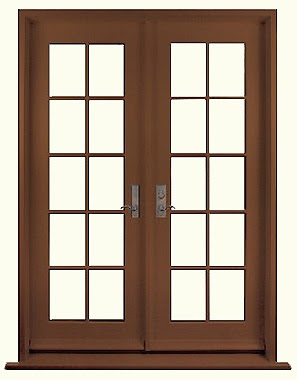
| Not the actual doors we saw but close enough! |
So we decided to create our own door package - find doors that we like with frosted glass for privacy and solid quality for a budget of $1500. You can see my cost breakdown at the bottom of this post.
We have a carpenter friend who made up a timber frame with metal step to the exact measurements we needed for $200. He also came and hung the 2 doors at a cost of $400 for the day. It's pretty tricky hanging 2 doors together as they need to be absolutely perfect, it takes time and skill so we were happy to leave this to someone with those talents. We also had our brickie help us cut the door frame out and brick it up which cost us $300 for half a day which again was well worth it for the work that was done.
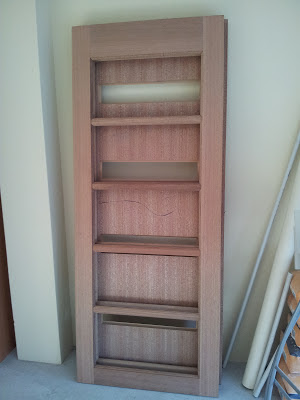
The doors themselves we found are seconds doors so have some small imperfections but are otherwise fine. We got the doors for $50 each they don't call me the bargain queen for nothing!
 |
| The 2 doors we scored for $50 each |
 |
| The types of glass from Modern Glass |
We measured the door inserts and then measured them 3 more times to be sure, before placing the order with Modern Glass for the 10 pieces of glass for the 2 doors. The cost for both doors was $260 which was almost half the price of other quotes. It really does pay to shop around!
The door frame we painted white as all the window and door frames in the house are white and it means the timber doors will really stand out and be the feature. The frame got a light sand then 2 undercoats of white paint with a light sand between coats. Once the doors are hung the frame needs 2 more coats of paint, the reason we didn't completely paint it before is we knew it'd get a bit scratched when the doors went in.
The doors themselves we want to keep the timber look so stained them. We used Sikkens Filter 7 Light Oak - it's meant to be a 3 coat process using both the Filter 7 and HLS but we heard a tip that you can dilute the Filter 7 with turps so you don't need to buy the HLS. This is because the turps allows the stain to penetrate the wood. So we got away with 1 coat of diluted Filter 7 and then 2 top coats of full strength Filter 7 straight from the tin.
It was 16 hours drying time between coats which meant it was a 3 day job to stain them completely. The first coat took a lot longer to dry probably because we used the turps so this needed a full 24 hours before we applied the next 2 coats. The stain came out really well but was pretty tricky on the wooden beading as they're so small and fiddly.
 |
| 1st coat going on - a mixture of Filter 7 and Turps |
 |
| 2nd and 3rd coats going on - this time full strength Filter 7 |
Now the doors were stained and dry they were ready to be hung. They were sanded and planed back until they fit perfectly in the frame and closed evenly together. This took more than a few times of hanging the 2 doors and then taking them off again and planing them some more. Even though the room was taped up and doors were closed my house had a fine layer of saw dust all the way through it which kept me busy mopping, dusting and cleaning!
Once the doors were hung properly we fitted the glass to the inside panels by removing the wooden beading, putting silicon all around the inside panel to help the glass stick and then slipping the glass in and putting the beading back in using a nail gun to nail the beading in place. This was a little scary first time using a nail gun and I kept praying that a nail wasn't going to shoot through and crack the glass. Or me. Eeeeek!
 |
| 1 door done and 1 to go |
We put 2 different sets of door handles on - a lockable set on the door that will open the most and a dummy set on the fixed door. They are all brushed silver handles by Gainsborough in the Tri Lock Series which means they have 3 ways of locking including a built in deadbolt for extra security. We bought the locks with the seconds doors and they were all in the original packaging and like new for less than half the normal price at a saving of $100 each handle.
We had to plaster around the door on the inside to cover the bricks and shape the door frame. This took quite a while as it was a first attempt at rendering a door frame and not something Mr P does for his day job! He was also working by lamp light because the electricity was cut days before in this room in preparation for the new electrics to be installed. He did a pretty good job in the end even though we didn't put the tools down until midnight!
 |
| Plastering over the bricks and around the door frame |
 |
| The top of the frame was the hardest part to shape and plaster |
The new doors make a huge difference to the amount of light that comes through it really brightens up the house which I'm loving. Let's take a look at the progress so far ...
 |
| Before - window in dining area |
 |
| Now - Doorway with french doors ... next job is painting! |
We saved almost $500 doing the doors ourselves but it's more than that because we got a better quality product and it was custom made with the type of glass we wanted. So folks, shop around for doors second hand and you'll be surprised what people don't want anymore ... one persons trash is your treasure!
Cost breakdown:
$200 - Timber Frame - custom made
$100 ($50 each) - Timber Doors
$260 ($130 each door) - 10 panes of Modern Etch Safety Glass
$75 ($50 and $25) - Gainsborough Tri Lock Handles
$28 - Paint for door frame
$37 - Sikkens Filter 7 - Light Oak Stain for 2 doors (with some left over)
$300 - Labor for our brickie to cut doorway in and brick up
$400 - Labor for our door carpenter to hang 2 doors and install locks
$1400 TOTAL
As you can see there is still a bit of work to do before the kitchen renovation is finished but we're getting there from what it looked like before to where it is now.
For updates on the kitchen as I go Like Jarrah Jungle on Facebook and you'll never miss a thing!
Sharing with link up parties
Wow Us Wednesdays at Savvy Southern Style
Make It Pretty at The Dedicated House


They look great! They will really add that little bit extra to your new kitchen space.
ReplyDeleteWhat an awesome result! I cannot beleive the amount of work you guys have done on the place. WELL DONE!! If your looking for a mini read on your tea break...come check out my little interview with Michaela Menichelli...I think you will likey ; )
ReplyDeletewell done! yes, it pays to shop around
ReplyDeleteWOW! They look great! Your are so handy!
ReplyDeleteThat is so good. Don't you just hate the attitude of renovation retailers. Good for you for doing your own thing and getting a better product into the bargain. That will be great access from your dining area to the outside.
ReplyDeleteCarolyn
Yes some businesses need a lesson in customer service thats for sure! The next project will need to be the deck :)
DeleteWhat a great job, love the way it turned out.
ReplyDeleteXO,
Christine
I love French doors! They let in so much light. they look great!
ReplyDeleteLooks amazing Michelle!!
ReplyDeletewow! You guys did an amazing job! Yes, shopping around does pay off, we shopped around and around and around for our floors, that totally paid off, so yes, taking the time is worth it! (you can see what we did on floors) http://wildoakdesigns.blogspot.com
ReplyDeleteNancy
Please take me bargain hunting with you. It's the one thing, since moving to Perth that I've completely failed out.
ReplyDeleteThanks so much for linking up over at Mystery Case for our Sharing is Caring Sunday. Just love your blog and looking forward to adding it to our 'worth casing' list.
Haha I love to find bargains I cant get enough! Thanks so much :)
DeleteThis is incredible Michelle! The timber looks gorgeous & what a dramatic change it makes to the room!! Now if I could only get my partner as motivated as you guys & give our house similar treatment!!!! What's your secret??
ReplyDeleteThanks so much. I guess when we bought the house we committed to a 5 year plan to renovate it and make it into a home we want to live in and enjoy :) Plus I think rewards at the end of each project are a must after all the hard work is done!
Delete