Related Posts Plugin for WordPress, Blogger...

Friday, May 31, 2013

Fridays Letters - Dear Week Off Work

Friday you have come around bloody fast this week and not only is it a long weekend but I have the whole of next week off work. Woo hoo!
 
I'm sharing my Friday's Letters with Ashley at The Sweet Season head on over here to link up your letters too.
 
I'm imagining I'm writing this weeks letters from this very modern and shiny home office tapping away at the keyboard while sipping on a dry martini.


Dear Week Off Work - Taking a whole week off next week so the kitchen can be installed is a bitter sweet thing ... yay the kitchen is going in after 6 weeks of waiting but boo I have to hang around home for deliveries and installation!
 
Dear Long Weekend - What it's the WA Day Long Weekend this week? I wouldn't know I'll be working at home! The theme this year is Celebrate WA and is a day to recognise our Indigenous history, European settlers and many people from all over the world who now call WA home.
 
Dear Kitchen Reno - This weekend is the last one to get everything ready for the install next week. We still have floorboards to finish sanding, walls to plaster, a ceiling to paint, appliances and lights to buy, kitchen cabinets to inspect and to pick out the granite slab for the bench top ... the list goes on!
 
Dear French Doors - The doorway is in, the glass has been ordered cut and collected and we have to fit the glass into the doors, stain the doors, then hang them over the weekend. Having french doors has been a long lived dream and I can't wait to see how the finish product looks. You better be awesome doors!

Dear New Ceiling - Sometimes it's nice to pay someone else to do some of the work instead of us ... and that included putting in the new ceiling in the kitchen this week. Pity we're the ones that have to paint it though!
 
Dear Kitchen With No Lights - The kitchen lights were disconnected on Tuesday so the new ceiling could go in which means we're walking around this room in darkness which isn't fun for a scardy cat like me! It has made cooking on the oven/stove impossible too so I see some lazy dinners and dining out until the new kitchen and lights are in ... this could be another week or so!
 
Dear Floor Sander - How dare you slip and cut into poor Mr P's wrist. He had to get stitches and has put a halt on the work he can do. Whose going to sand the floorboards now you stupid bloody sander!
 
Dear Mr P - You have been working your butt off on this reno and it wouldn't be possible to do without you. Even with a stitched up wrist you are determined to get this kitchen finished. You're amaze-balls. You are awesome babe xx
 
Dear Lexi - Week 19 and you are still digging holes every time I give you a bone. But why do you dig so many holes .... is it because you can't remember where you buried the bone?
 
Photobucket
 
Head on over here to link up your Friday's Letters


[Image via my Pinterest here ... find me here] Pin It Now!

Thursday, May 30, 2013

How We Turned A Window Into A Doorway

The vision of turning our Dining Room window into a doorway that leads out onto a deck was thought of on the very first day we moved in. Worn out from moving both Mr P and my stuff from 2 different houses into our first home together we were sitting back under the patio admiring out new house and one of my mates who helped us move said ...
 
It would be good if that window was a door to outside
then I said
Yes yes oh yes onto a deck ... I've always wanted a deck!
 
The window on the right hand side is the one we want to turn into a door way
We've had some Dining Room dilemmas due to the size of our Dining Room being too small to entertain in so we decided to create an outdoor dining area with a new outdoor setting and entertain outside. This has worked really well throughout the years we've had some great dinner parties outside. Because the Dining Room was then free of furniture the aquarium and wine buffet was moved into the Dining Room and the space was otherwise left free so there was room to sit at the kitchen bench without feeling to crammed in.
 
Dining Area inside
Aquarium and wine buffet moved into the Dining Area

Dining area outside

Fast track a few years on and in our kitchen renovation we have allowed for the doorway to be built into the design. Although it will take some space out of our already small dining area, we have the idea of having a slim line dining table and chairs like a bench seat and table up against the wall so we can entertain in here if there's just a few of us and we'll otherwise head outside to the larger area. This allows us the best of both worlds - a small entertaining area inside and a larger entertaining outside.
 
You'll see below we have drawn on the wall where the kitchen bench will come up past the window. We've allowed enough room for a set of double doors to be installed in place of this window. Unfortunately, we changed our minds after the design was signed off on where we wanted the kitchen bench to come up to - where it is now it's going to protrude into the dining space too much which would mean the doors would be pushed into the corner rather than centred. As this part of the kitchen cabinets had already been made we had to pay $200 extra for the change, to reduce the size of the bench and the set of drawers on the end. Whilst I wasn't happy about losing storage space in the drawers we decided it was worth the sacrifice to get the right feel for the room and be happy with the end result.

Kitchen bench drawn on the wall to show where the bench will come up to
 
Last weekend the brickie who built our garage extension and Mr P spent the day turning the window into a doorway. Firstly, the glass windows and jarrah frame was removed. 

Loosening the jarrah frame
 
The old glass windows removed
 
Removing the jarrah frame and taking out the metal lintels around the brick frame work


Window removed ... there's no going back now!
Once the window was removed the heavy duty wet saw was used to cut a doorway out of the double brick wall - this was a very dusty and noisy job. The height of the doorway didn't help either, as you can see there is quite a steep drop from the inside of the house to the backyard.
 
Out comes the heavy duty artillery - wet saw to cut through the double brick walls

Making progress cutting out the doorway
Once the doorway was cut out we were ready to install the timber frame and then brick it up and cement it into place.

The custom made double door frame

Doorway cut out ready for door frame to go in
Fitting the door frame and making sure it was perfectly level took a bit of time and patience
 
Once it was in place the frame was bricked into place with bricks and cement
Fitting a metal lintel across the top of the frame
Once the frame was in we had to protect it by either painting or staining the wood. We decided to paint it to match the rest of our window and door frames which are painted white. The double doors we are going to keep the wood look and stain them to make them a feature.

Mr P sanding the frame ready for painting ...
my big bro helping or hindering (not sure which!) by keeping the beers flowing!
Painting on the undercoat and the next day they got a light sand and another coat of undercoat
and are now ready for a coat of white after the doors are installed
(they will probably get scuffed or marked which is why we're painting them after the doors go on)
The door way will be boarded up for 2 weeks until we have the double doors fitted
So these are the doors that we are installing, we scored them for $50 each they are seconds doors so have slight imperfections and they also need glass which we are getting quotes for and will have a go at fitting the glass ourselves. Once the doors are installed we will stain them to protect them from the weather.
 
Our 2 doors we scored for $50 each - they need glass inserts and staining

So what about that deck? Yea ummmm that's the next project after the kitchen ... and probably after the Courtyard too.

For now it will be a doorway out to the backyard with a steep drop so we'll probably keep the doors locked until we can come up with some sort of platform!

Take a look around your home you might have a window that would make a perfect doorway too!

Sharing with Link Parties:
The Dedicated House - Make It Pretty Monday 
Savvy Southern Style - Wow Us Wednesdays
52 Mantels - Thursdays Are Your Days
 
[All images my own] 

Pin It Now!

Wednesday, May 29, 2013

Book Club: Before I Go To Sleep by S J Watson

This was my 3rd turn to pick the book for The Tuesday Girls book club read for May. After my dismal choice last time and my lighthearted pick the first time I researched long and hard about what would be a great read for a group discussion and decided on Before I Go To Sleep by S J Watson.
 
 
This is the story of a middle aged woman Christine who has an accident and loses her memory. Every day she wakes up she has no memory of the man she is married to, who her friends and family are, and how she came to where she is today.
 
As the story progresses Christine starts to see a Dr who wants to help her regain her memory and suggests she keep a journal so she can write down her day and remember things. Day by day Christine writes the things she has learnt in her diary from what her husband tells her before he leaves for work and what the Dr tells her when she secretly meets with him and she slowly starts to piece together her life.
 
This is a great thriller/suspense book and kept me turning the pages to see what was going to happen. You want Christine to learn more about herself so you can see her get help and work out what happened to her and the whole time you know someone caused this accident but you're just not sure who.
 
I would recommend this book to everyone, I think it's a great read for young and old and makes you appreciate the simple things in life like waking up every morning and knowing who you are and why you love those closest to you.
 
I give this book 4 stars
 
Jarrah Jungle's Star Rating:
1 Bad - I'd rather eat brussel sprouts topped with anchovies than read this again
2 Not Good - I'd rather watch re-runs of Neighbours than read this again
3 Ok - I'm sitting on the fence - its not great but not terrible either
4 Good - I'd pass up a pack of tim tams for this read
5 Great - I'd pass up a date with Johnny Depp for this read
 
[Image via Angus and Robertson]
 
Pin It Now!

Monday, May 27, 2013

5 Tips For Buying Kitchen Appliances

I was pretty confused in the beginning about how I should even start to compare and pick out the appliances needed for our kitchen renovation so I've put together my top 5 tips to hopefully help anyone else on the same kitchen appliance hunting mission.
 

1. First up, you need to work out the size of your appliances

For us, before the kitchen cupboards could be finalised we needed to give the appliance specifications to the kitchen company so the cupboards could be made to the right size. The choices are usually pretty standard for your Oven, Cook top and Range hood - either 600mm or 900mm. As space was limited for our kitchen we chose 600mm for all of these appliances.

The Dishwasher recess is pretty standard again at 600mm and most have adjustable feet so you can change the height. There is the option of building in a Dishwasher if you want hidden appliances but there's a lot less choice of dishwashers for this and the cost is more as you need to have a panel and kick board made to cover the dishwasher.

Lastly, the Microwave recess is usually a standard 600mm but we reduced ours so we had more cupboard space. This means our microwave will be smaller but I've tested it to check my dishes will fit in it and they do so that's fine.
 
 
2. Don't just admire the products in store - Use and abuse them
 
Looks can be deceiving the appliances might look shiny and flash but then the door is stiff and hard to open, the knobs are in the wrong spot and they'll annoy you, there are so many things to consider and it's all about your own personal choice. So play with the products, grab a pot and see how they'll sit on the cook top, open and close and pull everything out of the oven to see if you like how it functions. Don't be shy - get right in there and see if they work how you want them to.
 
It's also a good idea to take your tape measure with you so (a) you look like you know what you're doing even if you don't! and (b) you don't have to ask for dimensions if it's not shown which is more often than you would think. I also take photos so I can remember what they looked like.
 
 
3. Work out your budget and brands
 
If you have the money to spend you can pick all top end products BUT like most of us on a budget you need to decide what is most important to spend your money on and where you want to save money and spend the least amount on.

For example, I've never had a dishwasher before so any dishwasher is going to be better than me washing by hand! I don't need to buy a top of the range dishwasher for my first as long as it washes well, is easy to use and quiet then that is the brand I will pick. On the other hand I can't bake to save my life so I'm hoping a mid range full functioning oven is going to help me with that! 
 
 
4. Price wars - Where to shop and how to score a bargain
 
In stores, don't go by the ticket price on the appliance whatever you do, find a salesperson and ask them for their best price on each of the appliances. Ask them to write the prices down for you. Then go to other stores and ask the same questions. Don't let on you've had other quotes though try to be discrete you want them to think they are your go to store! You can then decide what store you want to deal with and it's a good idea to order everything from them as a bigger package should result in a better deal.
 
Check online as you might find an even better price - just check out the delivery time frames and any additional charges so you don't get caught out.
 
Kitchen companies can also give you quotes for appliances, we had a quote from our kitchen company but unfortunately they weren't the cheapest quote.
 
Some products also throw in freebies if you purchase a package or spend a certain amount which might sway you to purchase their brand. We scored a set of global knifes valued at $749 by purchasing Electrolux products (Oven and Stove) to the value of $2500.
 
 
5. Review and Research the products
 
Finally, check out some reviews either online or ask your friends and family what brands they use and the pros and cons. Honestly I didn't find a lot of reviews online from people who have used these products before which I found really surprising so I'm going to do my bit and share thorough reviews on the appliances I've picked once they're installed and I've tried and tested them.
 
Of course the product brochures and websites are going to sound convincing, they are selling their own product after all. But what you want is real people with real opinions who have used these products in their home and can vouch for how noisy, efficient, and value for money the product really is.

Bonus tip: Don't expect to go into a shop and buy everything on the first day! I think we've made about 8 shopping expeditions over the last few months to pick out our kitchen appliances and we still haven't bought everything yet! Give yourself the time to make the right decisions and remember Rome was not built in a day and neither is a kitchen renovation!
 
 
[Images via my Pinterest 1, 2, 3, 4, 5]
 
Pin It Now!

Sunday, May 26, 2013

Harvestbox Giveaway Winner

Thanks to everyone who entered the Harvestbox Giveaway and welcome to my new readers :-) I hope I made you just a little bit hungry talking about how tasty the Harvestbox snacks are!
 
Once again my wine glasses are put to good use helping draw out the winner .... these were a recent Birthday present and I'm waiting for the kitchen renovation to be finished so I can unpack them!
 
All entries in
 
  
And the winner is
 
 
Angie Boylan
 
 
Congratulations Angie please get in touch so I can have your Harvestbox delivered to you.
 
If you missed out on the Giveaway but would still like to try Harvestbox you can get your first box at half price for $3.97 by using this discount voucher. Valid for delivery anywhere in Australia ... enjoy!

 
[All images my own]
  
Pin It Now!

Friday, May 24, 2013

Friday's Letter - Dear Buns Of Steel

Happy Friday everyone! I'm sharing my Friday's Letters with Ashley at The Sweet Season head on over here to link up your letters too.
 
Today I'm imagining I'm writing my letters from this cosy home office space surrounded by pops of yellow and sipping on a lemon tea.
 
 
Dear Buns Of Steel - I've been walking the 30 minutes to and from the buss every day for 3 weeks now and I'm so damn proud of myself. The cold rainy weather hasn't stopped me yet I'm determined get me some buns of steel!
 
Dear Lexi - Week 18 and you barked like you've never barked before at our brickie whenever he started working with the noisy wet saw. It was great to hear you bark but probably not so nice to scare the wits out of him!
 
Dear Kitchen Reno - We have just 2 weekends left to get so many things ticked off the kitchen action plan ... this weekend we'll be restoring the floorboards by filling, sanding and sealing them, removing wall tiles and plastering and patching the walls ready for painting, remove the cornices from the ceiling so the new ceiling can go up. No sleep in for me this weekend!
 
Dear Big Bro - When you offer to come over and help us renovate that doesn't mean asking every hour if it's beer o'clock yet and just generally being a distraction so we don't get any work done! You must earn your beers boy!!
 
Dear 3 Year Blog-versary - What a milestone I crossed this week to be writing on this blog for 3 years now ... 520+ posts later and I'm loving my place in blogland more and more each day. Thanks for all your support my awesome readers xx
 
Dear Harvestbox Giveaway - Don't forget to enter my Giveaway by midnight tonight for a box of tasty snacks to be delivered to your door anywhere in Australia!
 
Photobucket
 
Head over here to join in this weeks Friday's Letters


[Image via my Pinterest ... follow me here]
 
Pin It Now!

Thursday, May 23, 2013

Happy 3 Year Blog-Versary!

I can't believe I've been blogging for 3 years now and I'm loving it more and more each day.
 
Thanks to all of you reading this right now ... your visits, comments, emails and support has kept me motivated for all these years and I really do appreciate the time and effort you make when you share, assure, advise and just stop by and say G'day :)


I'm out of the terrible 2s stage and feel my blog has definitely found its place and I know where I fit in to the Australian home and lifestyle genre and how I want my blog to continue to grow and develop. I have dreamed, gushed and talked about blogging as a career for years now and I don't know exactly how I can make that happen but the dream has begun and if I know anything about myself it's that I will do my better than best to make my dreams happen one way or another!

Since doing the BYW Blog Boss ecourse last month I've had a light bulb moment of thinking of my blog as a business and me being the boss - I want to tackle more sponsorships and reviews as I think I do thorough and thoughtful reviews using my corporate skills to their advantage! I've updated my About Me and Sponsor Page in the hope more opportunities will come my way. As the house renovations continue (will they ever end?!) this puts me in a prime position to review or sponsor house and home related products and I'm really keen to find some great local businesses to highlight and promote.

I love to share what I've learnt, misadventures along the way and the sense of humour needed to be a first time domestic godess and home renovator ... this is my place to write about it all and I'm so glad you've all come on this journey with me. All up I've written over 520 posts and my most popular posts this year are:

Which just goes to show that you guys must enjoy reading about my renovations as much as I like writing about them it's a win win :-)

It's taken me a while but I've jumped on the social media bandwagon too and have my own Facebook page which I wish I had set up ages ago because it's such a great way to interact with people and share snippets without uploading an entire post. I've also joined Twitter over here but I don't really know how to use it properly so if you have any pointers please tell me so I can pretend to know what I'm doing!

I have made online friendships with people near and far across the globe. I love being a part of this blogging community with such an outstanding bunch of people who make me want to be bigger and better than I thought that I could be. Thanks again my awesome readers for your support xx


Here's to an exciting 3rd year ahead and making dreams come true!

What's a celebration without a Giveaway? Don't forget to enter my Harvest Box Giveaway here closing tomorrow!
 
[Images via my Pinterest here and here]
 
Pin It Now!

Wednesday, May 22, 2013

Prawns - How Do You Like Them?

My favourite seafood of choice is Australian Tiger Prawns. I absolutely love prawns either having them cold in a prawn cocktail or cooked and stirred through a hot creamy pasta.
 
The beauty of a prawn cocktail is you only need a few ingredients - prawns, lettuce and sauce and you have yourself a nice little starter before dinner.


If avocados are in season I'll add one chopped up and squeeze on lemon juice and some freshly cracked pepper. For sauce I'll use seafood sauce and mix in some mayonnaise for added creaminess.


The perfect accompaniment to a prawn cocktail is a glass of chilled sweet rose wine ... it's a bit of a summery dish but honestly I enjoy them all year round.


Check out some of my other prawn recipes here:
Crayfish and Prawn Cocktails
Prawn Mango Pappadums with better photos of them here
Chargrilled Lemon Grass Prawns with Vietnamese Salad

What's your favourite seafood recipe?

[All images my own]

Pin It Now!

Tuesday, May 21, 2013

DIY: How To Repair A Hole In The Floorboards (Using Pantry Shelves!)

You all must know how much I love our jarrah floorboards - I've named this blog after all the jarrah found throughout our home so that will give you a pretty big hint ... Me love them long time!!
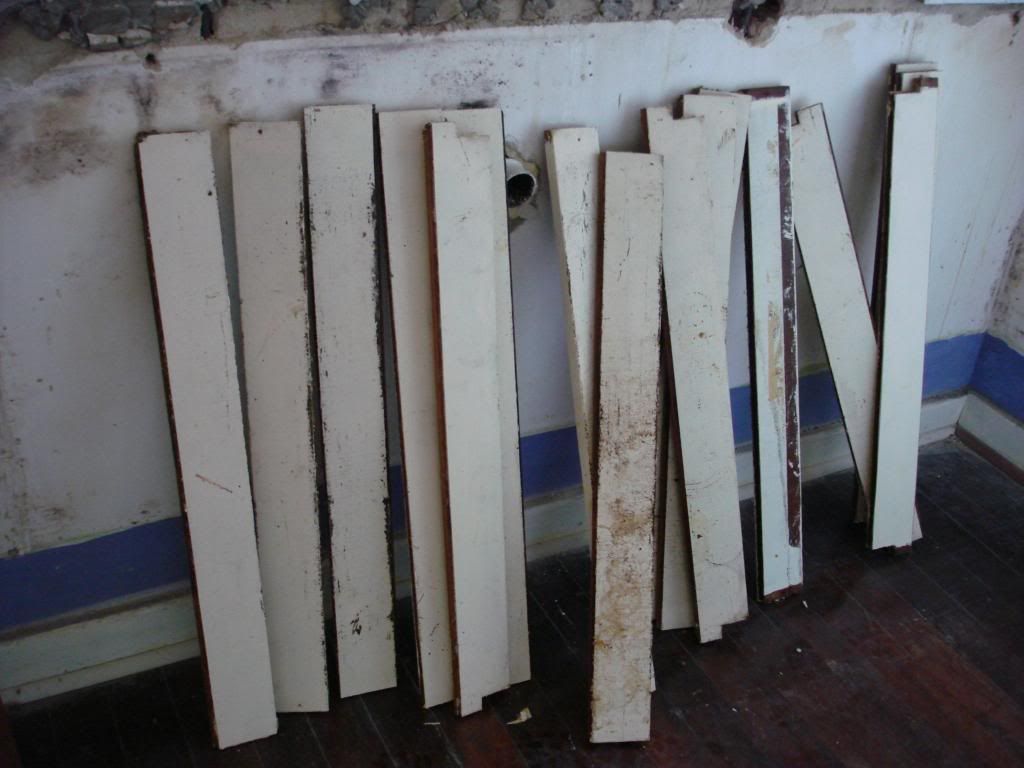
When we knocked down the brick pantry it left a few holes in the floorboards that needed to be repaired. We thought we'd have to trawl through salvage yards trying to find a match to the floorboards but we didn't have to spend a cent or even leave the house for these little babies to land in our laps. 

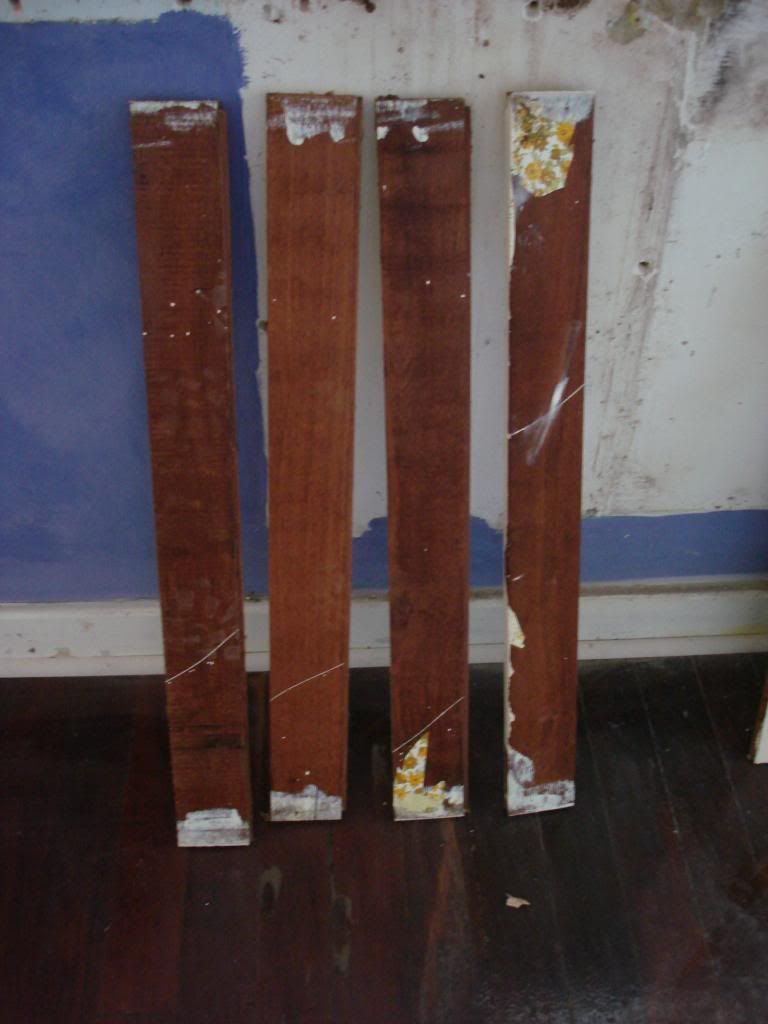
Luck was on our side because the pantry shelves we knocked out just so happened to be made out of our jarrah floorboards.

I kid you not, come take a look ...


The old pantry about to be knocked down
The pantry shelves were made out of our floorboards
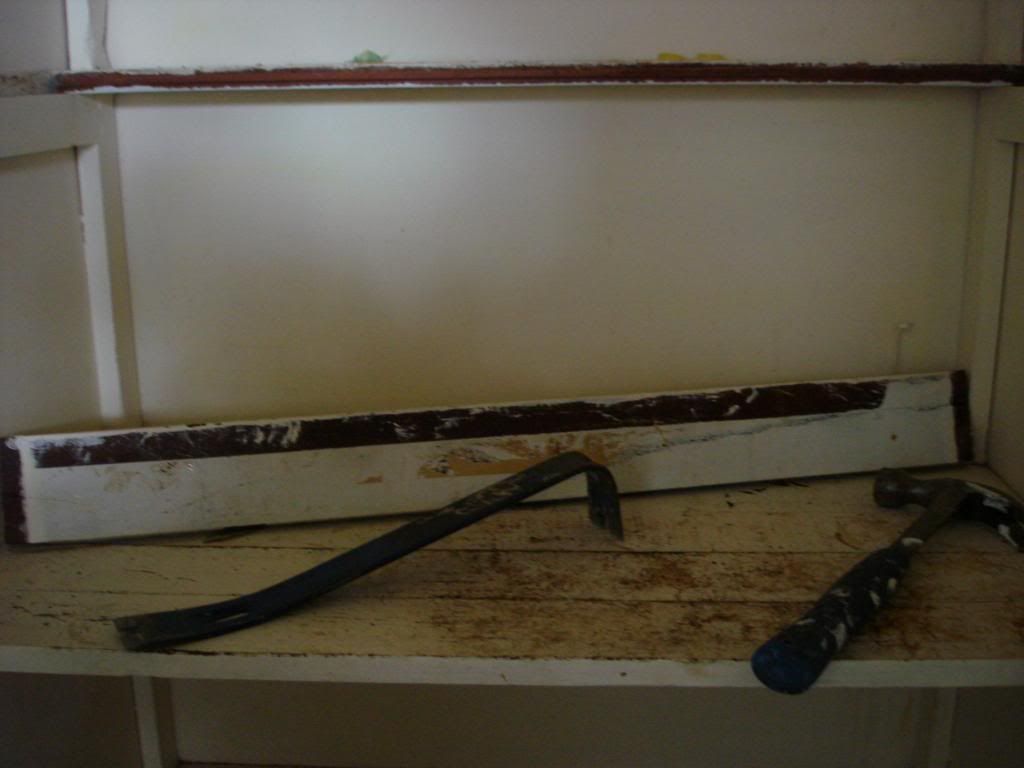
All the shelves removed

Setting aside the best floorboards to re-use that weren't covered in paint or sticky contact paper

Mr P spent a bit of time under the house strengthening the floor before the floorboards could be installed. 4 solid jarrah beams recycled from the garage extension were fitted under the floorboards and screwed into place.

Then the floorboards were clicked into place and nailed down.
  
The pantry with the skirting removed shows there's going to be some holes in the floor

Pantry removed and holes needing repair
Mr P cut around the floorboards that needed repair so they looked like they were staggered and naturally laid that way
Installed 4 big jarrah beams under the house to support the new floor

The pantry shelves aka floorboards then clicked into place
NB: This head lamp is the best invention in the world and so handy when needing to see things better
it gets used all the time!

Whoops one floorboard snapped going back in ... nothing a bit of glue won't fix!
Ta da new floorboards in place

There were 3 boards fixed here plus 1 along the back wall. I like how they are staggered so they will blend in with the rest of the floor.

The floorboards in the Kitchen/Dining Area are now ready to be restored - we need to put filler between each of the boards, then sand them back to remove any scratches or marks in the wood, then they'll be ready for a coat of Tung Oil. Once it's dry they'll get another very light sand and a second coat of Tung Oil. You will never know the floorboards were patched once we've given them the time and attention they deserve!

This is the very last room left to restore the floorboards in - we've done all 4 bedrooms, the Hallway and Living Room. Phew that's a lot of hours gone into loving these floors!

Sharing with The Dedicated House link up party Make It Pretty Monday

 photo F0F68C01A59FABD46732FC15E1D8816D_zpsc6047f2f.png

For exclusive extras and daily updates ... follow Jarrah Jungle on Facebook, Instagram and Twitter


[All images my own]
Pin It Now!